Post Syndicated from Pauline Kelly original https://aws.amazon.com/blogs/messaging-and-targeting/getting-started-with-push-notifications-using-aws-amplify/
This article was written by Pauline Kelly and Rob Costello, Public Sector Solutions Architects, AWS.
The code in this blog will run on OSX 10.11.6 (El Capitan) and higher, and XCode 8.1 and higher.
Push notifications are a key capability provided by mobile apps to engage with users, providing real-time updates or new information. However, they require integration of several components provided by different vendors. This can be difficult for new mobile developers, or developers who are new to Amazon Web Services (AWS).
As a mobile app developer, building high-quality apps that people want to use requires focus on the front-end components. Still, backend services also need to be considered to help ensure the app provides the level of scalability, reliability, and security that is expected of modern mobile applications. In this post, we will provide an example of how to implement Push Notifications in your mobile apps using AWS Amplify and Amazon Pinpoint, using React Native code to help get you started.
Usage Patterns
There are several use cases where developers benefit from adding Push Notifications into their mobile app, including:
- Asynchronous actions, such as when an order is placed through an app, and confirmation or status notifications are sent to the user.
- Scheduled reminders, to provide time-bound notifications to users to prompt engagement, such as “It’s been 7 days since you last checked in, would you like to check in now?”.
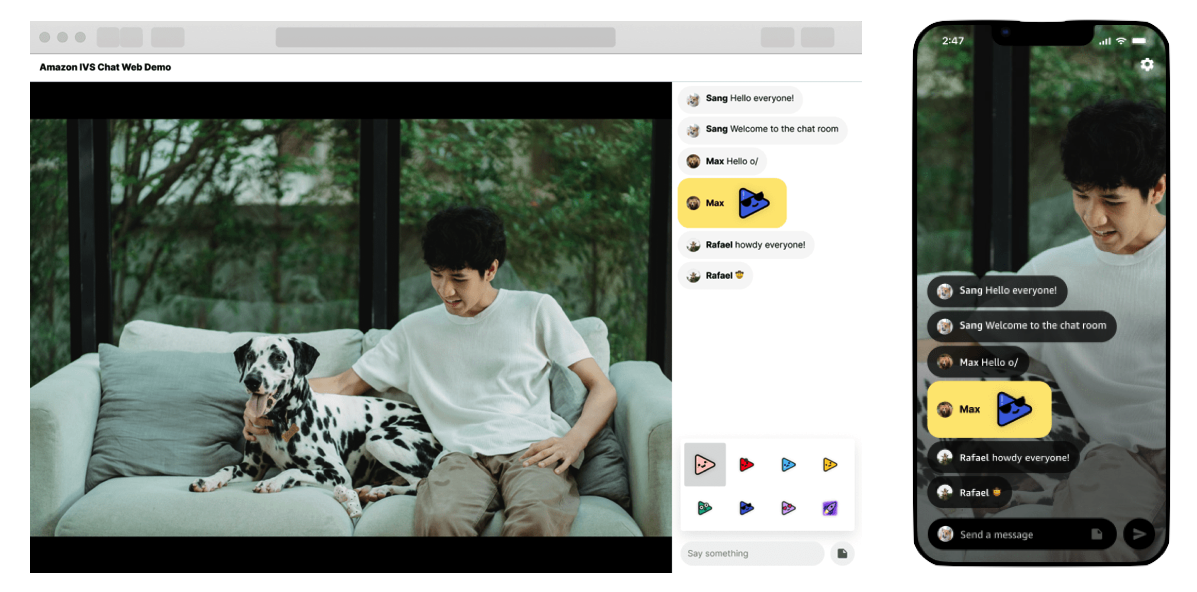
- Instant messaging, where your app provides two-way communication (i.e., chat). This ensures your users can engage with each other in near real-time.
Component Definitions
The components necessary to add push notifications to your app are:
Platform – These are the services provided by mobile device builders (e.g. Apple, Google, Amazon), that transport the messages to the end devices. The Platforms offer device registration, app token creation and management, and the delivery channel for notifications to be delivered to devices. There are several different services that you can use to send push notifications to the users of your applications. The platform you use largely depends on which app store your customers use to obtain your app. The most common platforms are Apple Push Notification service (APNs), Firebase Cloud Messaging (FCM), Baidu Cloud Push, and Amazon Device Messaging (ADM).
Provider – The Provider allows app registration and messaging to be coordinated by your mobile apps backend system, to allow for event or schedule based interactions from your backend with your mobile app. In AWS, we provide both Amazon Simple Notification Service (SNS) and Amazon Pinpoint to fill the role of the Provider.
Client – The client is your mobile application, running on a physical device. On initial launch of the application, two persistent and secure channels are established. First is between the Platform and the Client, which results in the creation of a globally-unique, app-specific device token. Next, the other sets up push notifications between the Provider and the Platform, using the device token. The device token is used to identify the destination for the notifications.

AWS Options
AWS provides two services that can be used for provide Push Notification services for your mobile apps.
Amazon Pinpoint – Pinpoint enables marketers and developers to deliver customer-centric engagement experiences. It provides a collection of capabilities that enable collection of data from audiences, real-time and historic analytics, and execution of campaigns for direct customer engagement over multiple channels, such as email, SMS, or push notifications. Pinpoint makes it easy to manage device registration, integration with notification channel systems, and integration with other AWS services to create a fully-featured mobile application backend. AWS Amplify includes support for deploying and configuring Pinpoint projects to use in your mobile application.
Amazon Simple Notification Service (SNS) – SNS, or Simple Notification Service, is a publish-subscribe service that accepts incoming messages and delivers them to a variety of destinations, such as using push notifications to mobile devices. Messages are sent from a Publisher (your mobile app backend) to a Subscription, in the form of a Topic. Subscriptions are linked to one or more Platform Applications, which is the Platform you want to connect to (such as APNs or FCM). Each Platform Application has individual Endpoints which are created using the SNS SDK on the device, and passing in the unique device token. To explore fanout patterns with SNS, refer to this blog post.
While both SNS and Pinpoint have Push Notifications capability, Amazon Pinpoint provides a simpler development experience when leveraging AWS Amplify, and a more robust management and operational capability for app owners and developers. The rest of this post will focus on the use of Pinpoint and Amplify.
Registration and Data-flows
In this post we will use the APNs (Apple Push Notification Service) platform for push notifications, but a similar pattern is used for other platforms. The following events take place when a push notification is triggered:
- A Device establishes a TLS connection with APNs based on a pre-existing device-specific certificate, and requests an app-specific token to use for push notifications.
- The Device passes the token to the AWS provider to register for notifications.
- Based on some form of event or trigger, such as a marketer launching a new campaign, a notification can be generated programmatically and sent to the AWS provider (Pinpoint or SNS).
- The AWS provider delivers the notification to APNs, along with the associated device token(s) to deliver it.
- APNs pushes the notification to the device(s).

For details of how the APNs platform works, please consult the relevant services documentation at https://developer.apple.com/library/archive/documentation/NetworkingInternet/Conceptual/RemoteNotificationsPG/APNSOverview.html.
Setting up APNs prerequisites
Note: You will need an account with the Apple Developer Program, as an individual or as part of an organization, and you must have agent or admin privileges in that account. Also, Push Notifications in the Apple ecosystem require a physical device, the iOS simulator is not capable of receiving push notifications.
To setup the required APNs components, follow the Amplify guide to create:
- An app ID.
- An SSL certificate, which authorizes you to send push notifications to your app through APNs.
- A registration for your test device, such as an iPhone, with your Apple Developer account.
- An iOS distribution certificate, which enables you to install your app on your test device.
- A provisioning profile, which allows your app to run on your test device.
Setting up your development workstation
Note: As this post focuses on using APNs for an iOS device, you must perform the following steps on an Apple device.
On your development workstation, install all React Native CLI prerequisites identified at https://reactnative.dev/docs/environment-setup, including:
- NodeJS: JavaScript runtime, used to run your application
- Watchman: watches files and records when they change, used to update your React Native app automatically rather than manually triggering a rebuild while developing
- Xcode: integrated development environment for creating iOS applications and more, installed on macOS
- CocoaPods: a dependency manager for Swift and Objective-C Cocoa projects
You will need to set up the Amplify CLI, which is used to configure the application with Amplify. Be sure to configure the Amplify CLI with credentials and other settings following the documentation here before proceeding.
Set up a new React Native App
Create a new React Native App to begin:
npx react-native init MyApp —template react-native-template-typescript
cd MyApp
Firstly, use the Amplify CLI to initialize the new app:
amplify init
Scanning for plugins...
Plugin scan successful
Note: It is recommended to run this command from the root of your app directory
? Enter a name for the project MyApp
? Enter a name for the environment dev
? Choose your default editor: Visual Studio Code
? Choose the type of app that you're building javascript
Please tell us about your project
? What javascript framework are you using react-native
? Source Directory Path:  src
? Distribution Directory Path: /
? Build Command:  npm run-script build
? Start Command: npm run-script start
Using default provider  awscloudformation

For more information on AWS Profiles, see:
https://docs.aws.amazon.com/cli/latest/userguide/cli-configure-profiles.html

? Do you want to use an AWS profile? Yes
? Please choose the profile you want to use default
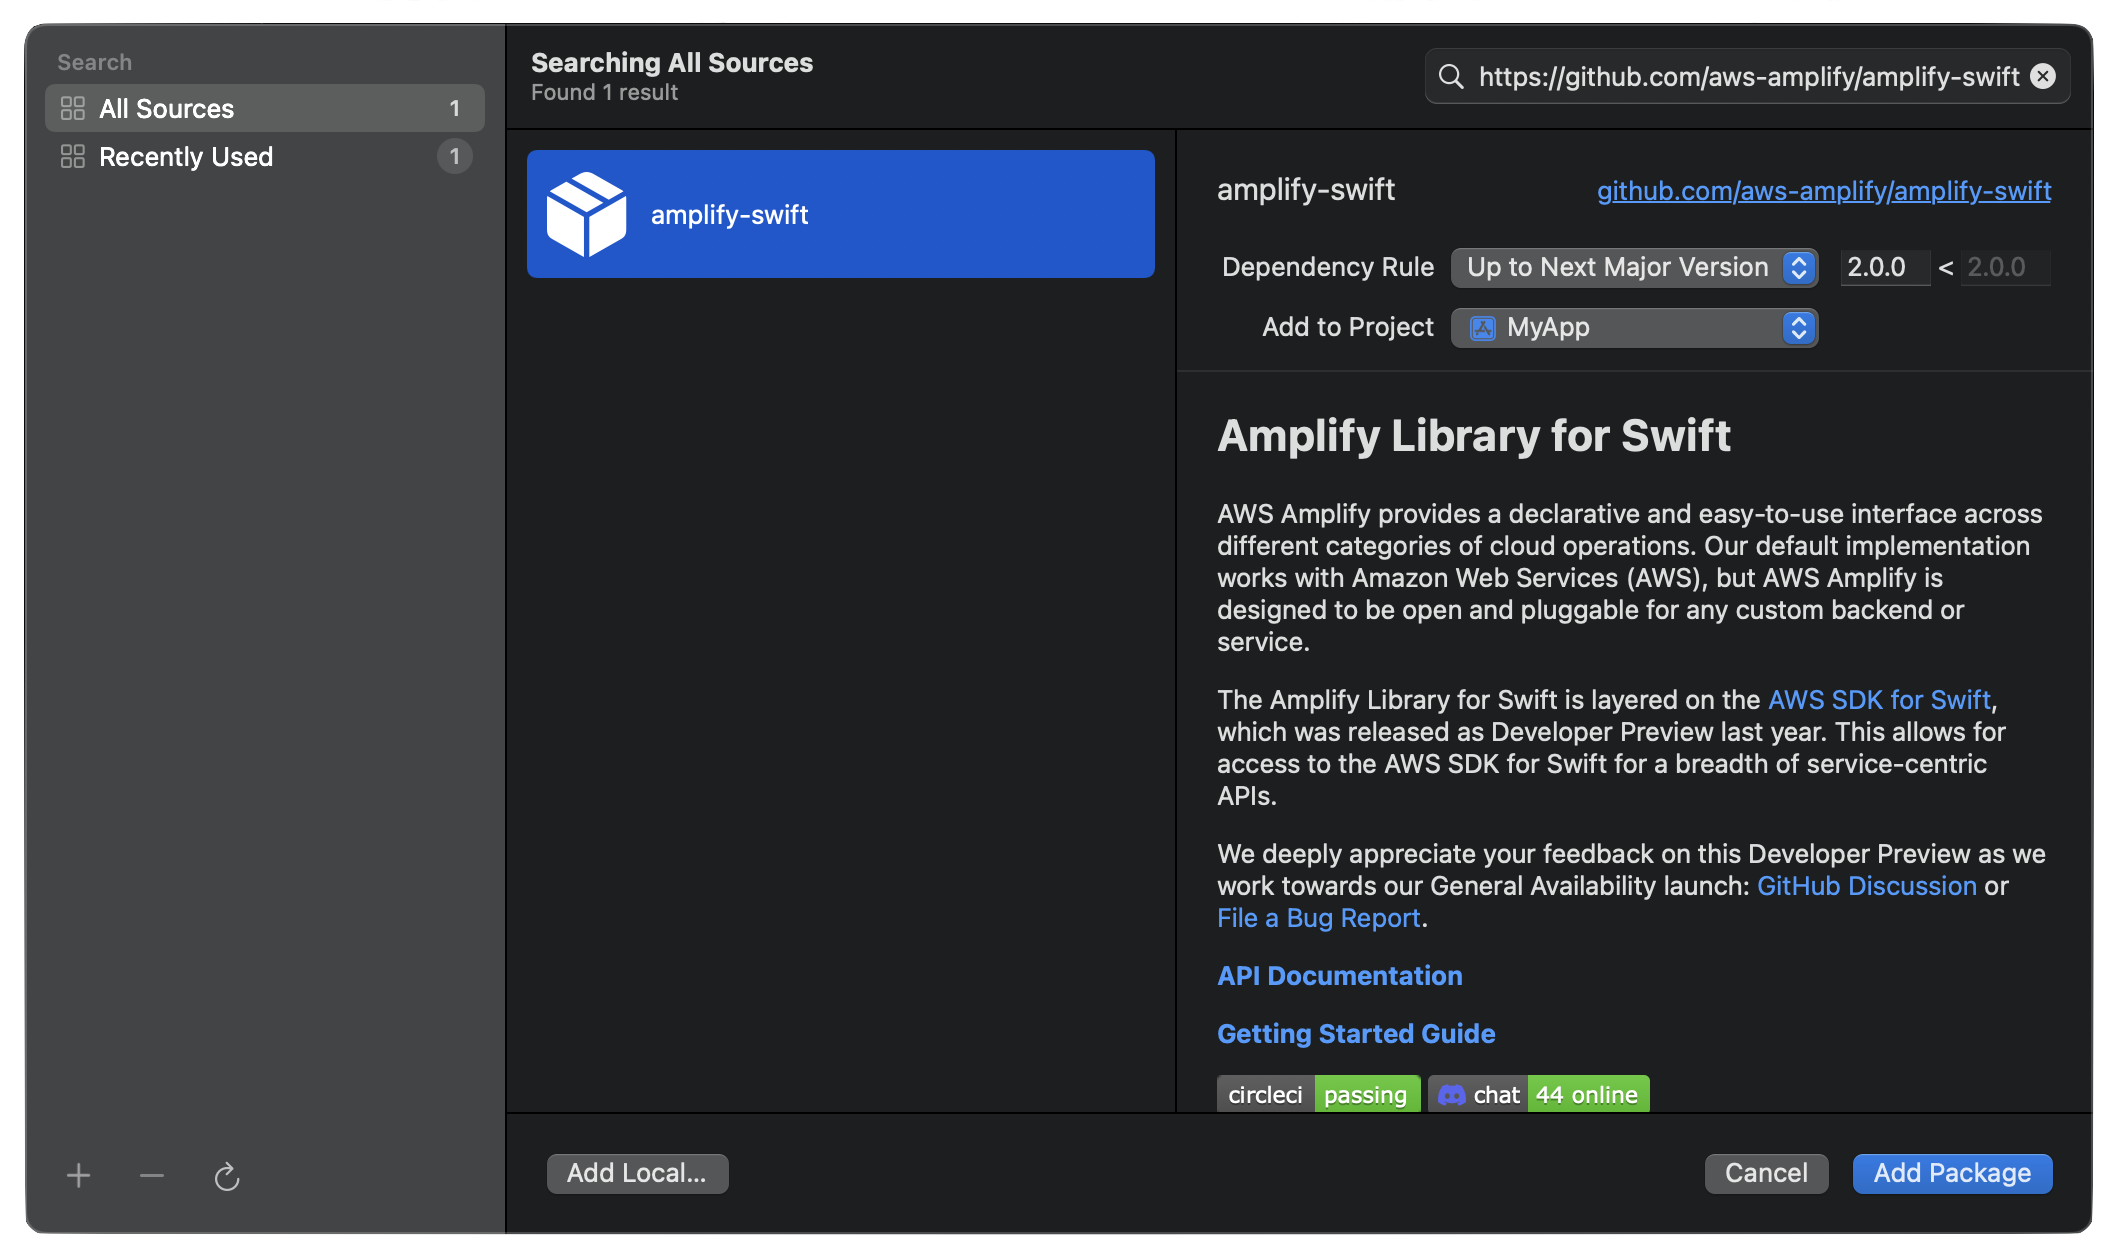
Then install the required React and CocoaPod dependencies:
npm install aws-amplify-react-native aws-amplify @aws-amplify/pushnotification @react-native-community/push-notification-ios @react-native-community/netinfo
npx pod-install
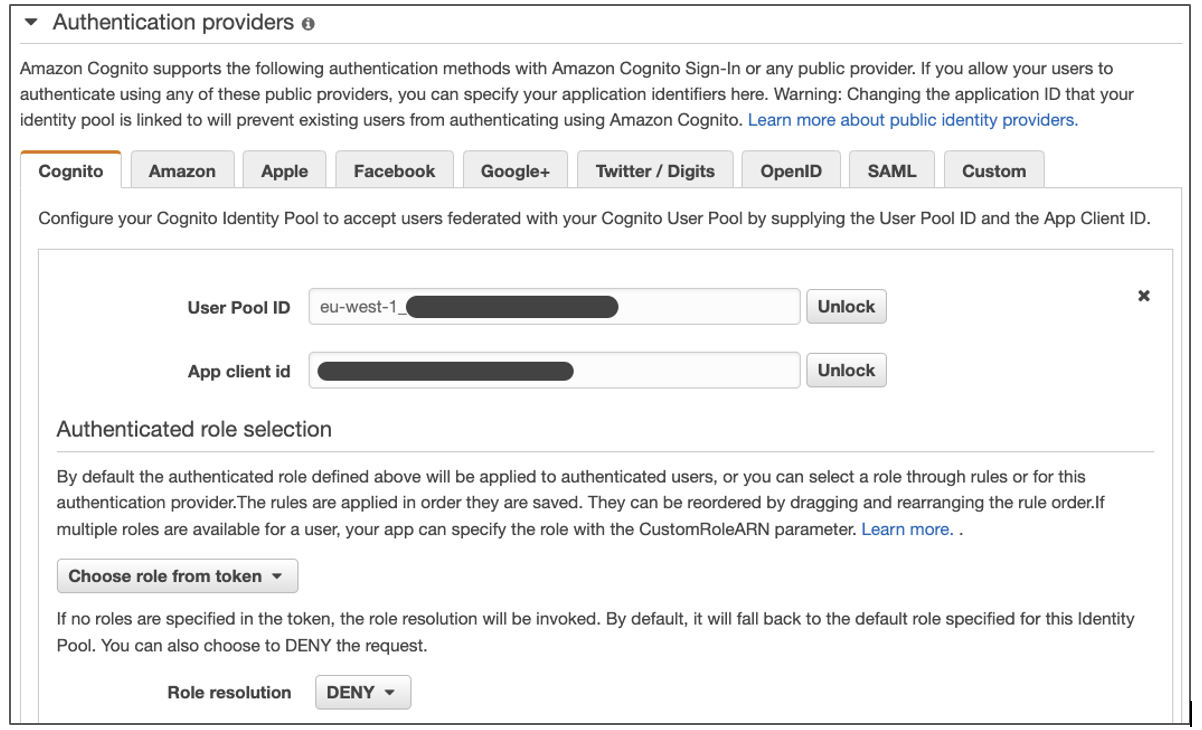
We are now going to add authentication for the user to sign into the app, and send/receive push notifications. Adding authentication with the default configuration creates a Cognito User Pool in the cloud, and allows Amplify applications to use the identity of the authenticated user.
Note that authentication with Cognito User Pools is not strictly required for Amazon Pinpoint Push Notifications to function, you can use Cognito Identity Pools for unauthenticated integration with Pinpoint APIs in your mobile app.
amplify add auth
Do you want to use the default authentication and security configuration? Default configuration
Warning: you will not be able to edit these selections.
How do you want users to be able to sign in? Username
Do you want to configure advanced settings? No, I am done.
To finish the creation of the Amazon Cognito User Pool, push the changes to AWS:
amplify push
? Are you sure you want to continue? (Y/n)
The Amplify Analytics module is required before Push Notifications can be configured. The Analytics module creates and configures the Amazon Pinpoint endpoint required for the PushNotification library to be able to register for and be a target for notifications.
amplify add analytics
? Select an Analytics provider Amazon Pinpoint
? Provide your Pinpoint resource name: MyAppAnalytics
? Apps need authorization to send analytics events. Do you want to allow guests and unauthenticated users to send analytics events? (we recommend you allow this when getting started) (Y/n) Yes
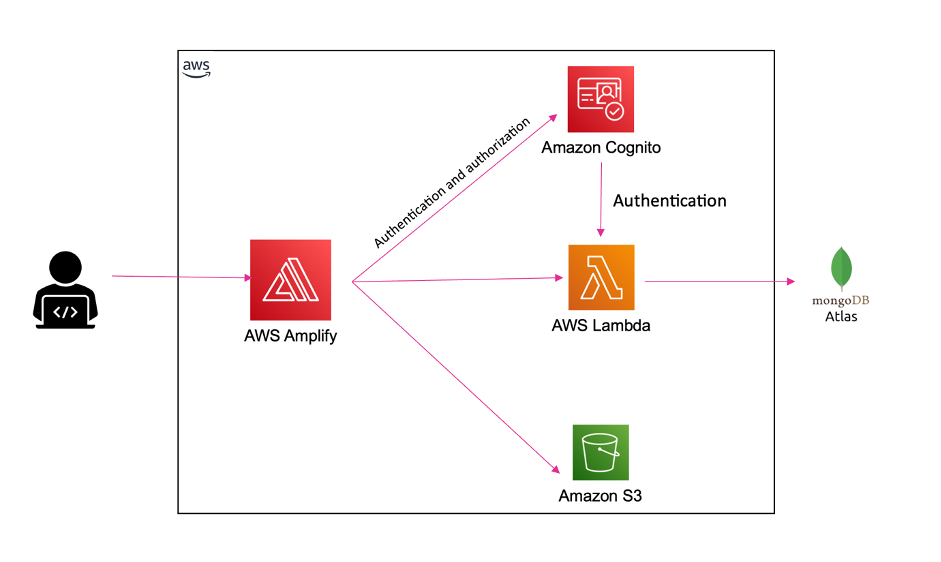
To finish the creation of the Amazon Pinpoint endpoint by Amplify CLI, push the changes to AWS. Here is a list of the cloud resources that will be created when you push the stack to cloud:
- Amazon Cognito User Pool
- Amazon Cognito Federated Identity Pool
- Amazon Pinpoint Project (linked to User Pool)
- Associated AWS IAM Roles
For specific details, you can look in the “amplify” directory in your project for the AWS CloudFormation templates created by the cli.
amplify push
? Are you sure you want to continue? (Y/n)
Next, use the Amplify CLI to add notifications to the project. During the setup for notifications, Amplify will ask you for the path to your *.p12 certificate, which is generated in XCode using your Apple Developer Account. Please refer to the instructions here:
Amplify Notifications: https://docs.amplify.aws/lib/push-notifications/getting-started/q/platform/js#setup-for-ios
Pinpoint Push Notification Setup: https://docs.aws.amazon.com/pinpoint/latest/developerguide/apns-setup.html
amplify add notifications
? Choose the push notification channel to enable. APNS
? Provide your Pinpoint resource name: <Choose default or provide a name>
? Choose authentication method used for APNs Certificate
? The certificate file path (.p12): <path to APNs p12 certificate>
? The certificate password (if any):
MAC verified OK
✔ The APNS channel has been successfully enabled.
Note that when the Notifications category is added, Amplify CLI also adds the Auth category, which creates and configures an Amazon Cognito User to allow authenticated access to the Amazon Pinpoint endpoint.
Next, you will need to open the iOS workspace of the application in XCode, found in ios/MyApp.xcworkspace. To enable notifications to function on iOS, the following settings for the project should be changed using Xcode to enable the @react-native-community/push-notifications-ios module to function:
- Add the Background Mode – Remote Notifications capability – https://github.com/react-native-push-notification-ios/push-notification-ios#add-capabilities–background-mode—remote-notifications
- Add support for the notification and register events that will be used – https://github.com/react-native-push-notification-ios/push-notification-ios#augment-appdelegate
Finally, update the Apps Workspace settings in Xcode by setting the Bundler Identifier you created when configuring your Apple Developer account. Once your Team is specified in Xcode, it will now populate the associated Signing Certificate field.

Next you can configure your React Native app to send and receive Push Notifications.
Register and Receive Notifications
To register a device with Amazon Pinpoint to receive Push Notifications, the required libraries should be imported:
import Amplify from 'aws-amplify';
import awsconfig from './aws-exports';
import {withAuthenticator} from 'aws-amplify-react-native';
import Analytics from '@aws-amplify/analytics';
import PushNotification from '@aws-amplify/pushnotification';
import Auth from '@aws-amplify/auth';
Note that Pinpoint requires the Analytics category of Amplify to be configured and imported into your app.
With the required libraries loaded, the Amplify components should be configured with the AWS details created by the amplify push command that are stored in the aws-exports.js file.
Amplify.configure(awsconfig);
Auth.configure(awsconfig);
Analytics.configure(awsconfig);
PushNotification.configure(awsconfig);
Next, register functions to be called when the device registers with APNs, and when a notification is received.
The onRegister event will be triggered when iOS registers a new token with the APNs service, allowing the app to retrieve the token and register it with Amazon Pinpoint via the Analytics.updateEndpoint function. Take care to update the userId key in the Analytics configuration.
PushNotification.onRegister((token: any) => {
  _token = token;
  Analytics.updateEndpoint({
    address: token,
    optOut: 'NONE',
    userId: '<userId>',
  })
    .then((data) => {
      console.log('endpoint updated', JSON.stringify(data));
    })
    .catch((error) => {
      console.log('error updating endpoint', error);
    });
});
The onNotification event will be triggered when the open app receives a notification from Amazon Pinpoint via APNs. Here we can execute actions based on the notification if required:
PushNotification.onNotification((notification: any) => {
  // display notification in debug log in XCode
  console.log('in app notification received', notification);
});
If the app is not open when the notification is received, and the user clicks the notification prompt, the onNotificationOpened event will be triggered allow actions to also be executed.
PushNotification.onNotificationOpened((notification: any) => {
  // display notification in debug log in XCode
  console.log('the notification is opened from iOS', notification);
});
Finally, we must prompt the user to allow Push Notifications from the app:
PushNotification.requestIOSPermissions();
Send Push Notifications
To send Push Notifications, we can use the Amazon Pinpoint SDK. Push notifications are ordinarily sent from a back-end process or application, however you can send notifications from anywhere the Amazon Pinpoint SDK is used.
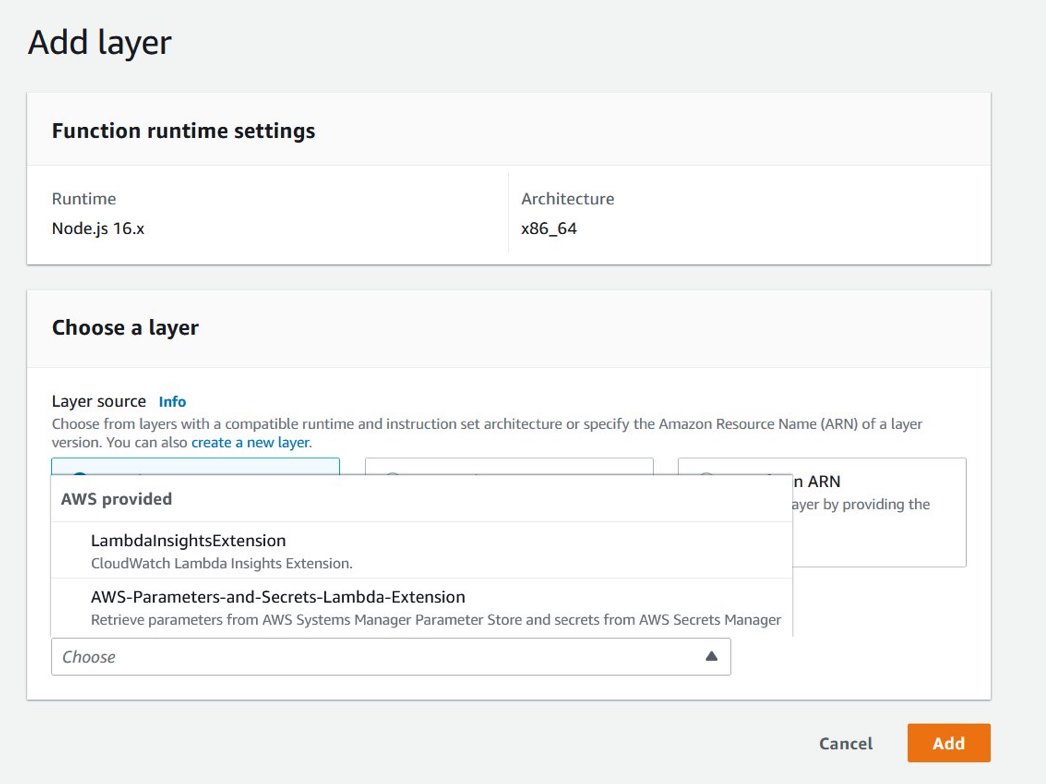
Code examples in Javascript and Python for using the SendMessage API are available in the Amazon Pinpoint documentation. These examples can be executed from a backend server process or via AWS Lambda.
The address token value used in these examples must match that of the target device token assigned by APNs. This will be visible in the console output of the mobile app when the onRegister event is triggered.
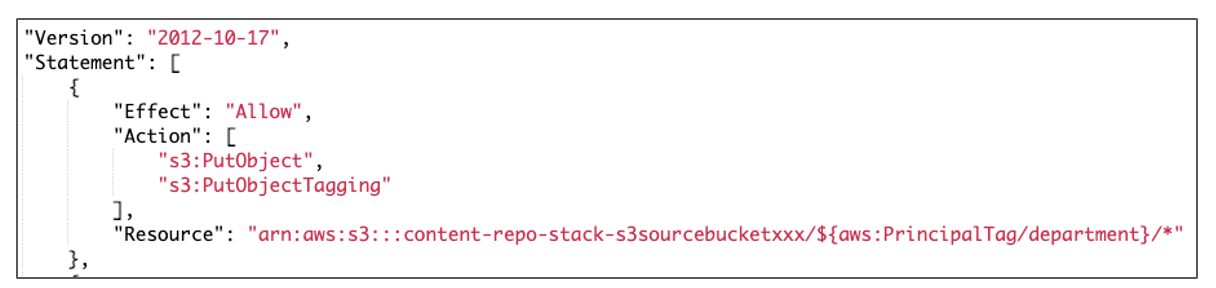
The IAM Role used by your backend server process or AWS Lambda must have the following permission policy applied:
{
    "Effect": "Allow",
    "Action": "mobiletargeting:SendMessages",
    "Resource": "arn:aws:mobiletargeting:<region>:<accountID>:apps/<projectID>/*"
}
Testing Push Notifications
Now run the project locally:
npx react-native run-ios
This will start Metro for React Native in a new Terminal window. Metro is a bundler for React Native which transpiles JavaScript into native code for use on client devices.

You should now be able to connect your test device to your development workstation, change the target device and run the application from Xcode (Push Notifications are not available in the iOS Simulator in XCode).
You can now test sending and receiving notifications.
Adding Pinpoint Features
Now that you have a functioning mobile app able to receive Push Notifications, Amazon Pinpoint can be used by app owners to engage users through customised Campaigns or Journeys. A campaign sends tailored messages on a schedule that you define. With Journeys, you can send messages to your customers based on their attributes, behaviours, and activities.
Thanks to AWS Amplify, the application has already deployed an Amazon Pinpoint Project for you, so your next steps for engaging users will be:
- Creating a Segment of your users that you would like to target.
- Create a Campaign or Journey to start communicating with your Segment using Push Notifications.
Amazon Pinpoint can be combined with other AWS services for more advanced scenarios, such as Predictive User Engagement. An example solution that integrates Amazon Personalize created by the AWS Solutions team can be found at to https://aws.amazon.com/solutions/implementations/predictive-user-engagement/
Cleanup
To clean up the project use:
amplify delete
to delete the resources created by the Amplify CLI.
Conclusion
This post has explored how Amazon Pinpoint and the Amplify Framework can be used more easily add Push Notifications into your mobile apps. Using the example provided, you can quickly get started with integrating the required components and configuring your AWS account, so you can run campaigns to engage with your users.
Feedback
We hope you like the Push Notification features in Amazon Pinpoint and the Amplify Framework! Let us know how we are doing, and submit any feedback in the Amplify JavaScript GitHub repository. You can read more about this feature on the Amplify Framework website. Also, check out our community site to find the events, posts, and contributors to the Amplify community.
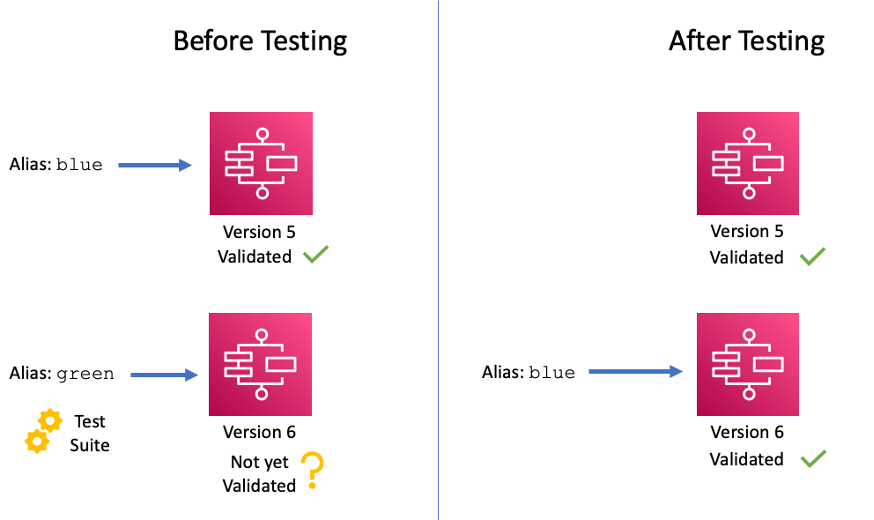 AWS Step Functions – You can now use versions and aliases to maintain multiple versions of your workflows, track which version was used for each execution, and create aliases that route traffic between workflow versions. To learn more, refer to this blog post.
 A few more news items and blog posts you might have missed:
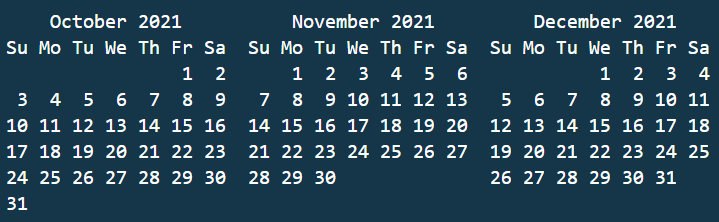
 AWS Global Summits – Check your calendars and sign up for the AWS Summit close to where you live or work:


 .
. 


 ” to my colleagues, and have a coffee while asking all your serverless questions. You can find all the upcoming AWS Summits in the events section at the end of this post.