Post Syndicated from Ramesh Venkataraman original https://aws.amazon.com/blogs/security/how-to-deploy-the-aws-solution-for-security-hub-automated-response-and-remediation/
In this blog post I show you how to deploy the Amazon Web Services (AWS) Solution for Security Hub Automated Response and Remediation. The first installment of this series was about how to create playbooks using Amazon CloudWatch Events, AWS Lambda functions, and AWS Security Hub custom actions that you can run manually based on triggers from Security Hub in a specific account. That solution requires an analyst to directly trigger an action using Security Hub custom actions and doesn’t work for customers who want to set up fully automated remediation based on findings across one or more accounts from their Security Hub master account.
The solution described in this post automates the cross-account response and remediation lifecycle from executing the remediation action to resolving the findings in Security Hub and notifying users of the remediation via Amazon Simple Notification Service (Amazon SNS). You can also deploy these automated playbooks as custom actions in Security Hub, which allows analysts to run them on-demand against specific findings. You can deploy these remediations as custom actions or as fully automated remediations.
Currently, the solution includes 10 playbooks aligned to the controls in the Center for Internet Security (CIS) AWS Foundations Benchmark standard in Security Hub, but playbooks for other standards such as AWS Foundational Security Best Practices (FSBP) will be added in the future.
Solution overview
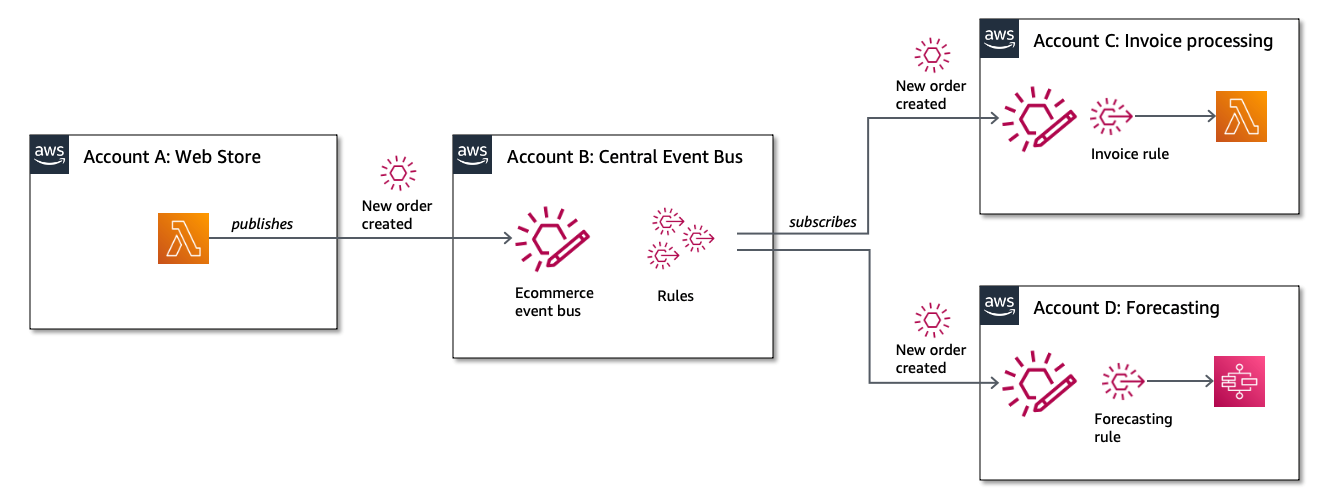
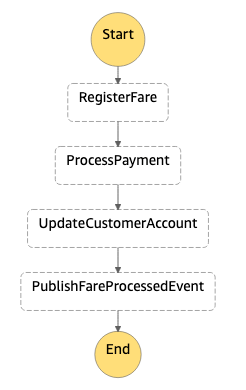
Figure 1 shows the flow of events in the solution described in the following text.
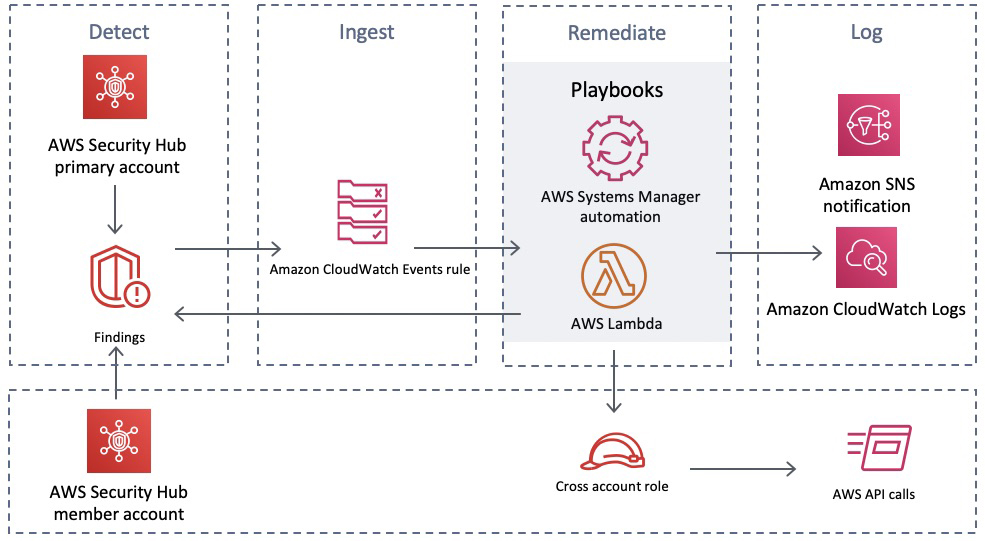
Figure 1: Flow of events
Detect
Security Hub gives you a comprehensive view of your security alerts and security posture across your AWS accounts and automatically detects deviations from defined security standards and best practices.
Security Hub also collects findings from various AWS services and supported third-party partner products to consolidate security detection data across your accounts.
Ingest
All of the findings from Security Hub are automatically sent to CloudWatch Events and Amazon EventBridge and you can set up CloudWatch Events and EventBridge rules to be invoked on specific findings. You can also send findings to CloudWatch Events and EventBridge on demand via Security Hub custom actions.
Remediate
The CloudWatch Event and EventBridge rules can have AWS Lambda functions, AWS Systems Manager automation documents, or AWS Step Functions workflows as the targets of the rules. This solution uses automation documents and Lambda functions as response and remediation playbooks. Using cross-account AWS Identity and Access Management (IAM) roles, the playbook performs the tasks to remediate the findings using the AWS API when a rule is invoked.
Log
The playbook logs the results to the Amazon CloudWatch log group for the solution, sends a notification to an Amazon Simple Notification Service (Amazon SNS) topic, and updates the Security Hub finding. An audit trail of actions taken is maintained in the finding notes. The finding is updated as RESOLVED after the remediation is run. The security finding notes are updated to reflect the remediation performed.
Here are the steps to deploy the solution from this GitHub project.
- In the Security Hub master account, you deploy the AWS CloudFormation template, which creates an AWS Service Catalog product along with some other resources. For a full set of what resources are deployed as part of an AWS CloudFormation stack deployment, you can find the full set of deployed resources in the Resources section of the deployed AWS CloudFormation stack. The solution uses the AWS Service Catalog to have the remediations available as a product that can be deployed after granting the users the required permissions to launch the product.
- Add an IAM role that has administrator access to the AWS Service Catalog portfolio.
- Deploy the CIS playbook from the AWS Service Catalog product list using the IAM role you added in the previous step.
- Deploy the AWS Security Hub Automated Response and Remediation template in the master account in addition to the member accounts. This template establishes AssumeRole permissions to allow the playbook Lambda functions to perform remediations. Use AWS CloudFormation StackSets in the master account to have a centralized deployment approach across the master account and multiple member accounts.
Deployment steps for automated response and remediation
This section reviews the steps to implement the solution, including screenshots of the solution launched from an AWS account.
Launch AWS CloudFormation stack on the master account
As part of this AWS CloudFormation stack deployment, you create custom actions to configure Security Hub to send findings to CloudWatch Events. Lambda functions are used to provide remediation in response to actions sent to CloudWatch Events.
Note: In this solution, you create custom actions for the CIS standards. There will be more custom actions added for other security standards in the future.
To launch the AWS CloudFormation stack
- Deploy the AWS CloudFormation template in the Security Hub master account. In your AWS console, select CloudFormation and choose Create new stack and enter the S3 URL.
- Select Next to move to the Specify stack details tab, and then enter a Stack name as shown in Figure 2. In this example, I named the stack SO0111-SHARR, but you can use any name you want.

Figure 2: Creating a CloudFormation stack
- Creating the stack automatically launches it, creating 21 new resources using AWS CloudFormation, as shown in Figure 3.

Figure 3: Resources launched with AWS CloudFormation
- An Amazon SNS topic is automatically created from the AWS CloudFormation stack.
- When you create a subscription, you’re prompted to enter an endpoint for receiving email notifications from Amazon SNS as shown in Figure 4. To subscribe to that topic that was created using CloudFormation, you must confirm the subscription from the email address you used to receive notifications.

Figure 4: Subscribing to Amazon SNS topic


Enable Security Hub
You should already have enabled Security Hub and AWS Config services on your master account and the associated member accounts. If you haven’t, you can refer to the documentation for setting up Security Hub on your master and member accounts. Figure 5 shows an AWS account that doesn’t have Security Hub enabled.
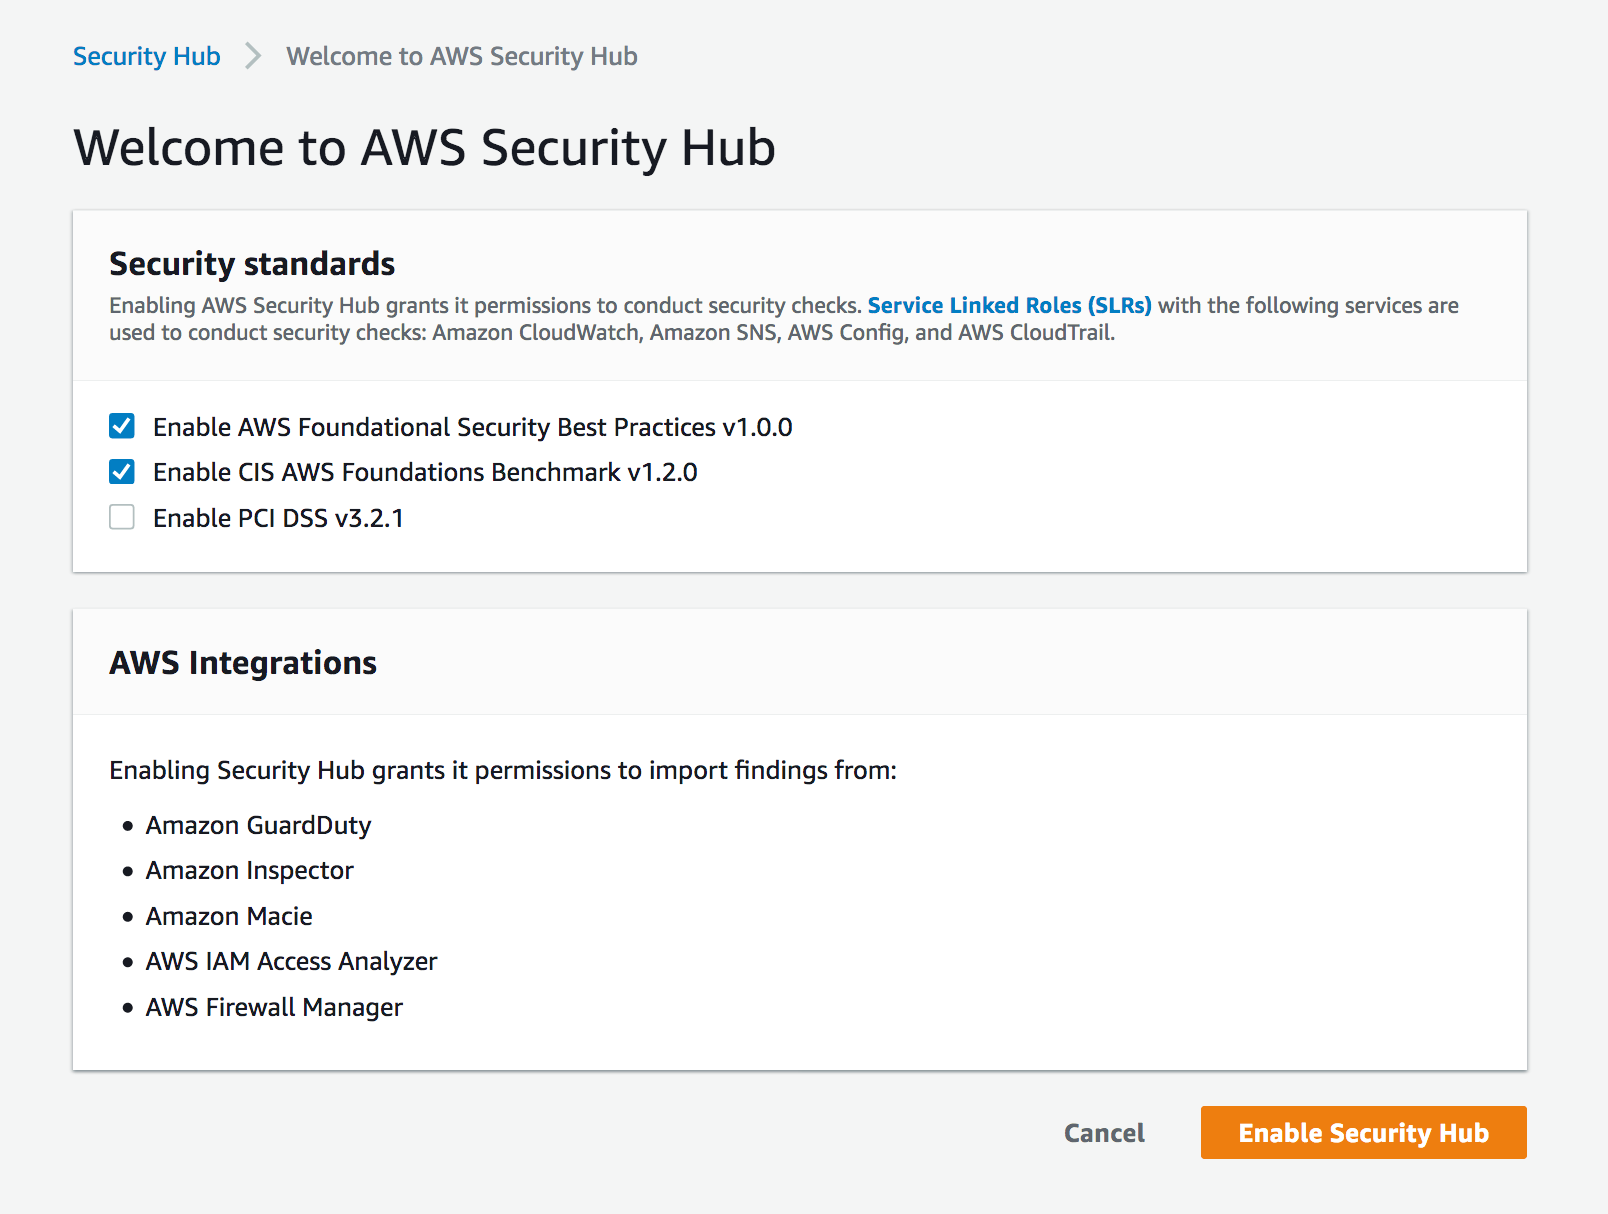
Figure 5: Enabling Security Hub for first time
AWS Service Catalog product deployment
In this section, you use the AWS Service Catalog to deploy Service Catalog products.
To use the AWS Service Catalog for product deployment
- In the same master account, add roles that have administrator access and can deploy AWS Service Catalog products. To do this, from Services in the AWS Management Console, choose AWS Service Catalog. In AWS Service Catalog, select Administration, and then navigate to Portfolio details and select Groups, roles, and users as shown in Figure 6.

Figure 6: AWS Service Catalog product
- After adding the role, you can see the products available for that role. You can switch roles on the console to assume the role that you granted access to for the product you added from the AWS Service Catalog. Select the three dots near the product name, and then select Launch product to launch the product, as shown in Figure 7.

Figure 7: Launch the product
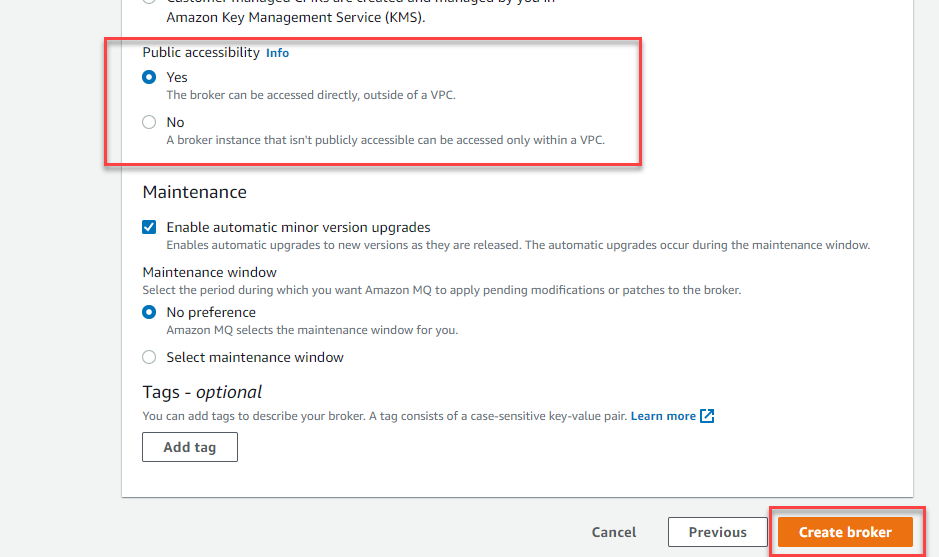
- While launching the product, you can choose from the parameters to either enable or disable the automated remediation. Even if you do not enable fully automated remediation, you can still invoke a remediation action in the Security Hub console using a custom action. By default, it’s disabled, as highlighted in Figure 8.

Figure 8: Enable or disable automated remediation
- After launching the product, it can take from 3 to 5 minutes to deploy. When the product is deployed, it creates a new CloudFormation stack with a status of CREATE_COMPLETE as part of the provisioned product in the AWS CloudFormation console.


AssumeRole Lambda functions
Deploy the template that establishes AssumeRole permissions to allow the playbook Lambda functions to perform remediations. You must deploy this template in the master account in addition to any member accounts. Choose CloudFormation and create a new stack. In Specify stack details, go to Parameters and specify the Master account number as shown in Figure 9.
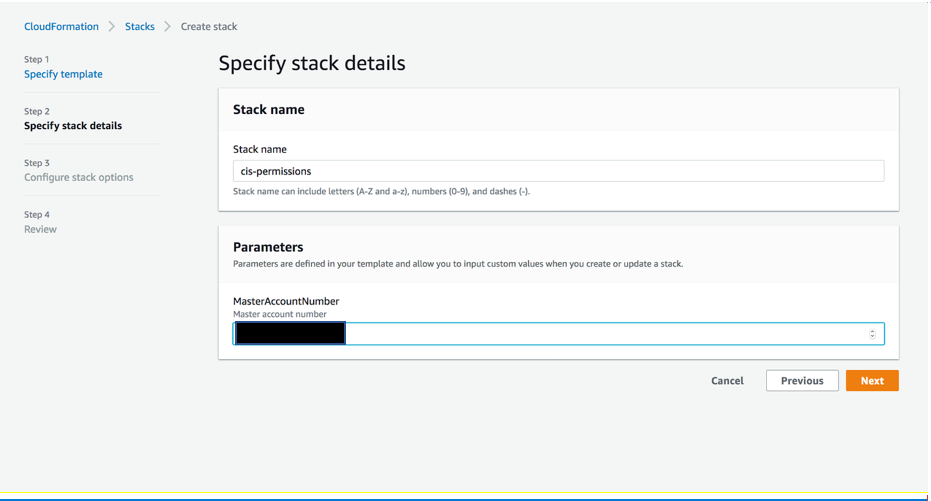
Figure 9: Deploy AssumeRole Lambda function
Test the automated remediation
Now that you’ve completed the steps to deploy the solution, you can test it to be sure that it works as expected.
To test the automated remediation
- To test the solution, verify that there are 10 actions listed in Custom actions tab in the Security Hub master account. From the Security Hub master account, open the Security Hub console and select Settings and then Custom actions. You should see 10 actions, as shown in Figure 10.

Figure 10: Custom actions deployed
- Make sure you have member accounts available for testing the solution. If not, you can add member accounts to the master account as described in Adding and inviting member accounts.
- For testing purposes, you can use CIS 1.5 standard, which is to require that the IAM password policy requires at least one uppercase letter. Check the existing settings by navigating to IAM, and then to Account Settings. Under Password policy, you should see that there is no password policy set, as shown in Figure 11.

Figure 11: Password policy not set
- To check the security settings, go to the Security Hub console and select Security standards. Choose CIS AWS Foundations Benchmark v1.2.0. Select CIS 1.5 from the list to see the Findings. You will see the Status as Failed. This means that the password policy to require at least one uppercase letter hasn’t been applied to either the master or the member account, as shown in Figure 12.

Figure 12: CIS 1.5 finding
- Select CIS 1.5 – 1.11 from Actions on the top right dropdown of the Findings section from the previous step. You should see a notification with the heading Successfully sent findings to Amazon CloudWatch Events as shown in Figure 13.

Figure 13: Sending findings to CloudWatch Events
- Return to Findings by selecting Security standards and then choosing CIS AWS Foundations Benchmark v1.2.0. Select CIS 1.5 to review Findings and verify that the Workflow status of CIS 1.5 is RESOLVED, as shown in Figure 14.

Figure 14: Resolved findings
- After the remediation runs, you can verify that the Password policy is set on the master and the member accounts. To verify that the password policy is set, navigate to IAM, and then to Account Settings. Under Password policy, you should see that the account uses a password policy, as shown in Figure 15.

Figure 15: Password policy set
- To check the CloudWatch logs for the Lambda function, in the console, go to Services, and then select Lambda and choose the Lambda function and within the Lambda function, select View logs in CloudWatch. You can see the details of the function being run, including updating the password policy on both the master account and the member account, as shown in Figure 16.

Figure 16: Lambda function log


Conclusion
In this post, you deployed the AWS Solution for Security Hub Automated Response and Remediation using Lambda and CloudWatch Events rules to remediate non-compliant CIS-related controls. With this solution, you can ensure that users in member accounts stay compliant with the CIS AWS Foundations Benchmark by automatically invoking guardrails whenever services move out of compliance. New or updated playbooks will be added to the existing AWS Service Catalog portfolio as they’re developed. You can choose when to take advantage of these new or updated playbooks.
If you have feedback about this post, submit comments in the Comments section below. If you have questions about this post, start a new thread on the AWS Security Hub forum or contact AWS Support.
Want more AWS Security how-to content, news, and feature announcements? Follow us on Twitter.


 Nuxt.js scaffolding tool inputs