I am pleased to announce that IBM and AWS have come together to offer Amazon Relational Database Service (Amazon RDS) for Db2, a fully managed Db2 database engine running on AWS infrastructure.
IBM Db2 is an enterprise-grade relational database management system (RDBMS) developed by IBM. It offers a comprehensive set of features, including strong data processing capabilities, robust security mechanisms, scalability, and support for diverse data types. Db2 is a well-established choice among organizations for effectively managing data in various applications and handling data-intensive workloads due to its reliability and performance. Db2 has its roots in the pioneering work around data storage and structured query language (SQL) IBM has done since the 1970s. It has been commercially available since 1983, initially just for mainframes, and was later ported to Linux, Unix, and Windows platforms (LUW). Today, Db2 powers thousands of business-critical applications in all verticals.
With Amazon RDS for Db2, you can now create a Db2 database with just a few clicks in the AWS Management Console, one command to type with the AWS Command Line Interface (AWS CLI), or a few lines of code with the AWS SDKs. AWS takes care of the infrastructure heavy lifting, freeing your time for higher-level tasks such as schema and query optimizations for your applications.
If you are new to Amazon RDS or coming from an on-premises Db2 background, let me quickly recap the benefits of Amazon RDS.
Amazon RDS offers the same Db2 database as the one you use on-premises today. Your existing applications will reconnect to RDS for Db2 without changing their code.
The database runs on a fully managed infrastructure. You don’t have to provision servers, install the packages, install patches, or maintain the infrastructure in an operational state.
The database is also fully managed. We take care of the installation, minor version upgrades, daily backup, scaling, and high availability.
The infrastructure can scale up and down as required. You can simply stop and then restart the database to change the underlying hardware and meet changing performance requirements or benefit from last-generation hardware.
Amazon RDS offers a choice of storage types designed to deliver fast, predictable, and consistent I/O performance. For new or unpredictable workloads, you can configure the system to automatically scale your storage.
Amazon RDS automatically takes care of your backups, and you can restore them to a new database with just a few clicks.
Amazon RDS helps to deploy highly available architectures. Amazon RDS synchronously replicates data to a standby database in a different Availability Zone (an Availability Zone is a group of distinct data centers). When a failure is detected with a Multi-AZ deployment, Amazon RDS automatically fails over to the standby instance and routes requests without changing the database endpoint DNS name. This switch happens with minimal downtime and zero data loss.
You can migrate your existing on-premises Db2 database to Amazon RDS using native Db2 tools, such as restore and import, or AWS Database Migration Service (AWS DMS). AWS DMS allows you to migrate databases in a single operation or continuously, while your applications continue to update the data on the source database, until you decide on the cut off.
Let’s see how it works I always like to get my hands on a new service to learn how it works. Let’s create a Db2 database and connect to it using the standard tool provided by IBM. I assume most of you reading this post come from an IBM Db2 background and don’t know much about Amazon RDS.
First, I create a Db2 database. To do this, I navigate to the Amazon RDS page of the AWS Management Console and select Create database. For this demo, I’ll accept most of the default values. I’ll show you, however, all the sections and will comment on the important configuration points you have to think about.
I select Db2 from among the multiple database engines Amazon RDS offers.
I select Production. Amazon RDS will deploy a default configuration tuned for high availability and fast, consistent performance.
Under Settings, I give a name to my RDS instance (this is not the Db2 catalog name!), and I select the master username and password.
Under Instance configuration, I choose the type of node to run my database. This will define the hardware characteristics of the virtual server: the number of vCPUs, quantity of memory, and so on. Depending on the requirements of your application, you can allocate instances offering up to 32 vCPUs and 128 GiB of RAM for IBM Db2 Standard instances. When you select IBM Db2 Advanced instances, you can allocate instances offering up to 128 vCPUs and 1 TiB of RAM. This parameter has a direct impact on the price.
Under Storage, I choose the type of Amazon Elastic Block Store (Amazon EBS) volumes, their size, and their IOPS and throughput. For this demo, I accept the values proposed by default. This is also a set of parameters that directly impact the price.
Under Connectivity, I select the VPC (in AWS terms, a VPC is a private network) where the database will be deployed. Under Public access, I select No to make sure the database instance is only accessible from my private network. I can’t think of a (good) use case where you want to select Yes for this option.
This is also where you select the VPC security group. A security group is a network filter that defines what IP addresses or networks can access your database instance and on what TCP port. Be sure to select or create a security group with TCP 50000 open to allow applications to connect to your Db2 database.
I leave all other options with their default value. It is important to open the Additional configuration section at the very bottom of the page. This is where you can give an Initial database name. If you don’t name your Db2 database here, your only option will be to restore an existing Db2 database backup on that instance.
This section also contains the parameters for the Amazon RDS automatic backup. You can choose a time window and how long we will retain the backups.
I accept all the defaults and select Create database.
After a few minutes, you can see your database is available.
I select the DNS name of the database instance Endpoint, and I connect to a Linux machine running in the same network. After installing the Db2 client package that I downloaded from the IBM website, I type the following commands to connect to the database. There is nothing specific to Amazon RDS here.
db2 catalog TCPIP node blognode remote awsnewsblog-demo.abcdef.us-east-2.rds-preview.amazonaws.com server 50000
db2 catalog database NEWSBLOG as blogdb2 at node blognode authentication server_encrypt
db2 connect to blogdb2 user admin using MySuperPassword
Once connected, I download a sample dataset and script from the popular Db2Tutorial website. I run the scripts against the database I just created.
As you can see, there is nothing specific to Amazon RDS when it comes to connecting and using the database. I use standard Db2 tools and scripts.
One more thing Amazon RDS for Db2 requires you to bring your own Db2 license. You must enter your IBM customer ID and site number before starting a Db2 instance.
To do so, create a custom DB parameter group and attach it to your database instance at launch time. A DB parameter group acts as a container for engine configuration values that are applied to one or more DB instances. In a Db2 parameter group, there are two parameters specific to IBM Db2 licenses: your IBM Customer Number (rds.ibm_customer_id) and your IBM site number (rds.ibm_site_id).
If you do not know your site number, reach out to your IBM sales organization for a copy of a recent Proof-of-Entitlement (PoE), invoice, or sales order. All these documents should include your site number.
Pricing and availability Amazon RDS for Db2 is available in all AWS Regions except China and GovCloud.
Amazon RDS pricing is on demand, and there are no upfront costs or subscriptions. You only pay by the hour when the database is running, plus the GB per month of database storage provisioned and backup storage you use and the number of IOPS you provision. The Amazon RDS for Db2 pricing page has the details of pricing per Region. As I mentioned earlier, Amazon RDS for Db2 requires you to bring your own Db2 license.
If you already know Amazon RDS, you’ll be delighted to have a new database engine available for your application developers. If you’re coming from an on-premises world, you will love the simplicity and automation that Amazon RDS offers.
Last week I saw an astonishing 160+ new service launches. There were so many updates that we decided to publish a weekly roundup again. This continues the same innovative pace of the previous week as we are getting closer to AWS re:Invent 2023.
Our News Blog team is also finalizing new blog posts for re:Invent to introduce awesome launches with service teams for your reading pleasure. Jeff Barr shared The Road to AWS re:Invent 2023 to explain our blogging journey and process. Please stay tuned in the next week!
Last week’s launches Here are some of the launches that caught my attention last week:
Amazon EC2 DL2q instances – New DL2q instances are powered by Qualcomm AI 100 Standard accelerators and are the first to feature Qualcomm’s AI technology in the public cloud. With eight Qualcomm AI 100 Standard accelerators and 128 GiB of total accelerator memory, you can run popular generative artificial intelligence (AI) applications and extend to edge devices across smartphones, autonomous driving, personal compute, and extended reality headsets to develop and validate these AI workloads before deploying.
PartyRock for Amazon Bedrock – We introduced PartyRock, a fun and intuitive hands-on, generative AI app-building playground powered by Amazon Bedrock. You can experiment, learn all about prompt engineering, build mini-apps, and share them with your friends—all without writing any code or creating an AWS account.
AWS Amplify celebrates its sixth birthday – We announced six new launches; a new documentation site, support for Next.js 14 with our hosting and JavaScript library, added custom token providers and an automatic React Native social sign-in update to Amplify Auth, new ChangePassword and DeleteUser account settings components, and updated all Amplify UI packages to use new Amplify JavaScript v6. You can also use wildcard subdomains when using a custom domain with your Amplify application deployed to AWS Amplify Hosting.
Also check out other News Blog posts about major launches published in the past week:
Amazon CloudWatch – You can use a new CloudWatch metric called EBS Stalled I/O Check to monitor the health of your Amazon EBS volumes, the regular expression for Amazon CloudWatch Logs Live Tail filter pattern syntax to search and match relevant log events, observability of SAP Sybase ASE database in CloudWatch Application Insights, and up to two stats commands in a Log Insights query to perform aggregations on the results.
AWS Local Zones in Dallas – You can enable the new Local Zone in Dallas, Texas, us-east-1-dfw-2a, with Amazon EC2 C6i, M6i, R6i, C6gn, and M6g instances and Amazon EBS volume types gp2, gp3, io1, sc1, and st1. You can also access Amazon ECS, Amazon EKS, Application Load Balancer, and AWS Direct Connect in this new Local Zone to support a broad set of workloads at the edge.
Additionally, Amazon RDS Multi-AZ deployments with two readable standbys now supports minor version upgrades and system maintenance updates with typically less than one second of downtime when using Amazon RDS Proxy.
Amazon QuickSight – You can programmatically manage user access and custom permissions support for roles to restrict QuickSight functionality to the QuickSight account for IAM Identity Center and Active Directory using APIs. You can also use shared restricted folders, a Contributor role and support for data source asset types in folders and the Custom Week Start feature, an addition designed to enhance the data analysis experience for customers across diverse industries and social contexts.
AWS Trusted Advisor – You can use new APIs to programmatically access Trusted Advisor best practices checks, recommendations, and prioritized recommendations and 37 new Amazon RDS checks that provide best practices guidance by analyzing DB instance configuration, usage, and performance data.
There’s a lot more launch news that I haven’t covered. See AWS What’s New for more details.
See you virtually in AWS re:Invent Next week we’ll hear the latest from AWS, learn from experts, and connect with the global cloud community in Las Vegas. If you come, check out the agenda, session catalog, and attendee guides before your departure.
Now generally available: Amazon Aurora MySQL zero-ETL integration with Amazon Redshift Today, we announced the general availability of Amazon Aurora MySQL zero-ETL integration with Amazon Redshift. With this fully managed solution, you no longer need to build and maintain complex data pipelines in order to derive time-sensitive insights from your transactional data to inform critical business decisions.
This zero-ETL integration between Amazon Aurora and Amazon Redshift unlocks opportunities for you to run near real-time analytics and machine learning (ML) on petabytes of transactional data in Amazon Redshift. As this data gets written into Aurora, it will be available in Amazon Redshift within seconds.
It also enables you to run consolidated analytics from multiple Aurora MySQL database clusters in Amazon Redshift to derive holistic insights across many applications or partitions. Amazon Aurora MySQL zero-ETL integration with Amazon Redshift processes over 1 million transactions per minute (an equivalent of 17.5 million insert/update/delete row operations per minute) from multiple Aurora databases and makes them available in Amazon Redshift in less than 15 seconds (p50 latency lag).
Furthermore, you can take advantage of the analytics and built-in ML capabilities of Amazon Redshift, such as materialized views, cross-Region data sharing, and federated access to multiple data stores and data lakes.
Let’s get started In this article, I’ll highlight some steps along with information on how you can get started easily. I will use my existing Amazon Aurora MySQL serverless database and Amazon Redshift data warehouse.
To get started, I need to navigate to Amazon RDS and select Create zero-ETL integration on the Zero-ETL integrations page.
On the Create zero-ETL integration page, I need to follow a few steps to configure the integration for my Amazon Aurora database cluster and my Amazon Redshift data warehouse.
First, I define an identifier for my integration and select Next.
On the next page, I need to select the source database by selecting Browse RDS databases.
Here, I can select my existing database as the source.
The next step asks me the target Amazon Redshift data warehouse. Here, I have the flexibility to choose the Amazon Redshift Serverless or RA3 data warehouse in my account or in different account. I select Browse Redshift data warehouses.
Then, I choose the target data warehouse.
Because Amazon Aurora needs to replicate into the data warehouse, we need to add an additional resource policy and add the Aurora database as an authorized integration source in the Amazon Redshift data warehouse.
I can solve this by manually updating in the Amazon Redshift console or let Amazon RDS fix it for me. I tick the checkbox.
On the next page, it shows me the changes that Amazon RDS will perform for us. I select Continue.
On the next page, I can configure the tags and also the encryption. By default, zero-ETL integration encrypts your data using AWS Key Management Service (AWS KMS), and I have the option to use my own key.
Then, I need to review all the configurations and select Create zero-ETL integration to create the integration.
After a few minutes, my zero-ETL integration is sucessfully created. Then, I switch to Amazon Redshift, and on the Zero-ETL integrations page, I can see that I have my recently created zero-ETL integration.
Since the integration does not yet have a target database inside Amazon Redshift, I need to create one.
Now the integration configuration is complete. On this page, I can see the integration status is active, and there is one table that has been replicated.
For testing, I create a new table in my Amazon Aurora database and insert a record into this table.
Then I switched to the Redshiftquery editor v2 inside Amazon Redshift. Here I can make a connection to the database that I formed as part of the integration. By running a simple query, I can see that my data is already available inside Amazon Redshift.
I found this zero-ETL integration very convenient for two reasons. First, I could unify all data from multiple database clusters together and analyze it in aggregate. Second, within seconds of the transactional data being written into Amazon Aurora MySQL, this zero-ETL integration seamlessly made the data available in Amazon Redshift.
Things to know
Availability – Amazon Aurora zero-ETL integration with Amazon Redshift is available in US East (Ohio), US East (N. Virginia), US West (Oregon), Asia Pacific (Singapore), Asia Pacific (Sydney), Asia Pacific (Tokyo), Europe (Frankfurt), Europe (Ireland), and Europe (Stockholm).
Supported Database Engines – Amazon Aurora zero-ETL Integration with Amazon Redshift currently supports MySQL-compatible editions of Amazon Aurora. Support for Amazon Aurora PostgreSQL-Compatible Edition is a work in progress.
Pricing – Amazon Aurora zero-ETL integration with Amazon Redshift is provided at no additional cost. You pay for existing Amazon Aurora and Amazon Redshift resources used to create and process the change data created as part of a zero-ETL integration.
The entire AWS News Blog team is fully focused on writing posts to announce the new services and features during our annual customer conference in Las Vegas, AWS re:Invent! And while we prepare content for you to read, our services teams continue to innovate. Here is my summary of last week’s launches.
Last week’s launches Here are some of the launches that captured my attention:
Amazon CodeCatalyst – You can now add a cron expression to trigger a CI/CD workflow, providing a way to start workflows at set times. CodeCatalyst is a unified development service that integrates a project’s collaboration tools, CI/CD pipelines, and development and deployment environments.
Amazon RDS – The root certificates we use to sign your databases’ TLS certificates will expire in 2024. You must generate new certificates for your databases before the expiration date. This blog post details the procedure step by step. The new root certificates we generated are valid for the next 40 years for RSA2048 and 100 years for the RSA4098 and ECC384. It is likely this is the last time in your professional career that you are obliged to renew your database certificates for AWS.
Amazon MSK – Replicating Kafka clusters at scale is difficult and often involves managing the infrastructure and the replication solution by yourself. We launched Amazon MSK Replicator, a fully managed replication solution for your Kafka clusters, in the same or across multiple AWS Regions.
Amazon CodeWhisperer – We launched a preview for an upcoming capability of Amazon CodeWhisperer Professional. You can now train CodeWhisperer on your private code base. It allows you to give your organization’s developers more relevant suggestions to better assist them in their day-to-day coding against your organization’s private libraries and frameworks.
Amazon EC2 – The seventh generation of memory-optimized EC2 instances is available (R7i). These instances use the 4th Generation Intel Xeon Scalable Processors (Sapphire Rapids). This family of instances provides up to 192 vCPU and 1,536 GB of memory. They are well-suited for memory-intensive applications such as in-memory databases or caches.
X in Y – We launched existing services and instance types in additional Regions:
Amazon Bedrock is now available in Europe (Frankfurt). This is important for customers in Europe because they often have to ensure their data stays in the European Union. You can now embed generative AI functionalities and access to large language models in your applications with the assurance that the prompts and customizations will stay in Europe.
The Official AWS Podcast – Listen each week for updates on the latest AWS news and deep dives into exciting use cases. There are also official AWS podcasts in several languages. Check out the ones in French, German, Italian, and Spanish.
Upcoming AWS events Check your calendars and sign up for these AWS events:
AWS Community Days – Join a community-led conference run by AWS user group leaders in your region: Jaipur (November 4), Vadodara (November 4), and Brasil (November 4).
AWS Innovate: Every Application Edition – Join our free online conference to explore cutting-edge ways to enhance security and reliability, optimize performance on a budget, speed up application development, and revolutionize your applications with generative AI. Register for AWS Innovate Online Asia Pacific & Japan on October 26.
If you use or plan to use Secure Sockets Layer (SSL) or Transport Layer Security (TLS) with certificate verification to connect to your database instances of Amazon RDS for MySQL, MariaDB, SQL Server, Oracle, PostgreSQL, and Amazon Aurora, it means you should rotate new certificate authority (CA) certificates in both your DB instances and application before the root certificate expires.
Most SSL/TLS certificates (rds-ca-2019) for your DB instances will expire in 2024 after the certificate update in 2020. In December 2022, we released new CA certificates that are valid for 40 years (rds-ca-rsa2048-g1) and 100 years (rds-ca-rsa4096-g1 and rds-ca-ecc384-g1). So, if you rotate your CA certificates, you don’t need to do It again for a long time.
Here is a list of affected Regions and their expiration dates of rds-ca-2019:
Expiration Date
Regions
May 8, 2024
Middle East (Bahrain)
August 22, 2024
US East (Ohio), US East (N. Virginia), US West (N. California), US West (Oregon), Asia Pacific (Mumbai), Asia Pacific (Osaka), Asia Pacific (Seoul), Asia Pacific (Singapore), Asia Pacific (Sydney), Asia Pacific (Tokyo), Canada (Central), Europe (Frankfurt), Europe (Ireland), Europe (London), Europe (Milan), Europe (Paris), Europe (Stockholm), and South America (São Paulo)
September 9, 2024
China (Beijing), China (Ningxia)
October 26, 2024
Africa (Cape Town)
October 28, 2024
Europe (Milan)
Not affected until 2061
Asia Pacific (Hong Kong), Asia Pacific (Hyderabad), Asia Pacific (Jakarta), Asia Pacific (Melbourne), Europe (Spain), Europe (Zurich), Israel (Tel Aviv), Middle East (UAE), AWS GovCloud (US-East), and AWS GovCloud (US-West)
The following steps demonstrate how to rotate your certificates to maintain connectivity from your application to your database instances.
Step 1 – Identify your impacted Amazon RDS resources As I said, you can identify the total number of affected DB instances in the Certificate update page of the Amazon RDS console and see all of your affected DB instances. Note: This page only shows the DB instances for the current Region. If you have DB instances in more than one Region, check the certificate update page in each Region to see all DB instances with old SSL/TLS certificates.
You can also use AWS Command Line Interface (AWS CLI) to call describe-db-instances to find instances that use the expiring CA. The query will show a list of RDS instances in your account and us-east-1 Region.
Step 2 – Updating your database clients and applications Before applying the new certificate on your DB instances, you should update the trust store of any clients and applications that use SSL/TLS and the server certificate to connect. There’s currently no easy method from your DB instances themselves to determine if your applications require certificate verification as a prerequisite to connect. The only option here is to inspect your applications’ source code or configuration files.
Although the DB engine-specific documentation outlines what to look for in most common database connectivity interfaces, we strongly recommend you work with your application developers to determine whether certificate verification is used and the correct way to update the client applications’ SSL/TLS certificates for your specific applications.
To update certificates for your application, you can use the new certificate bundle that contains certificates for both the old and new CA so you can upgrade your application safely and maintain connectivity during the transition period.
For information about checking for SSL/TLS connections and updating applications for each DB engine, see the following topics:
Step 3 – Test CA rotation on a non-production RDS instance If you have updated new certificates in all your trust stores, you should test with a RDS instance in non-production. Do this set up in a development environment with the same database engine and version as your production environment. This test environment should also be deployed with the same code and configurations as production.
To rotate a new certificate in your test database instance, choose Modify for the DB instance that you want to modify in the Amazon RDS console.
In the Connectivity section, choose rds-ca-rsa2048-g1.
Choose Continue to check the summary of modifications. If you want to apply the changes immediately, choose Apply immediately.
To use the AWS CLI to change the CA from rds-ca-2019 to rds-ca-rsa2048-g1 for a DB instance, call the modify-db-instance command and specify the DB instance identifier with the --ca-certificate-identifier option.
This is the same way to rotate new certificates manually in the production database instances. Make sure your application reconnects without any issues using SSL/TLS after the rotation using the trust store or CA certificate bundle you referenced.
When you create a new DB instance, the default CA is still rds-ca-2019 until January 25, 2024, when it will be changed to rds-ca-rsa2048-g1. For setting the new CA to create a new DB instance, you can set up a CA override to ensure all new instance launches use the CA of your choice.
You should do this in all the Regions where you have RDS DB instances.
Step 4 – Safely update your production RDS instances After you’ve completed testing in non production environment, you can start the rotation of your RDS databases CA certificates in your production environment. You can rotate your DB instance manually as shown in Step 3. It’s worth noting that many of the modern engines do not require a restart, but it’s still a good idea to schedule it in your maintenance window.
In the Certificate update page of Step 1, choose the DB instance you want to rotate. By choosing Schedule, you can schedule the certificate rotation for your next maintenance window. By choosing Apply now, you can apply the rotation immediately.
If you choose Schedule, you’re prompted to confirm the certificate rotation. This prompt also states the scheduled window for your update.
After your certificate is updated (either immediately or during the maintenance window), you should ensure that the database and the application continue to work as expected.
Most of modern DB engines do not require restarting your database to update the certificate. If you don’t want to restart the database just for CA update, you can use the --no-certificate-rotation-restart flag in the modify-db-instance command.
To check if your engine requires a restart you can check the SupportsCertificateRotationWithoutRestart field in the output of the describe-db-engine-versions command. You can use this command to see which engines support rotations without restart:
Even if you don’t use SSL/TLS for the database instances, I recommend to rotate your CA. You may need to use SSL/TLS in the future, and some database connectors like the JDBC and ODBC connectors check for a valid cert before connecting and using an expired CA can prevent you from doing that.
To learn about updating your certificate by modifying your DB instance manually, automatic server certificate rotation, and finding a sample script for importing certificates into your trust store, see the Amazon RDS User Guide or the Amazon Aurora User Guide.
Things to Know Here are a couple of important things to know:
Amazon RDS Proxy and Amazon Aurora Serverless use certificates from the AWS Certificate Manager (ACM). If you’re using Amazon RDS Proxy when you rotate your SSL/TLS certificate, you don’t need to update applications that use Amazon RDS Proxy connections. If you’re using Aurora Serverless, rotating your SSL/TLS certificate isn’t required.
Now through January 25, 2024 – new RDS DB instances will have the rds-ca-2919 certificate by default, unless you specify a different CA via the ca-certificate-identifier option on the create-db-instance API; or you specify a default CA override for your account like mentioned in the above section. Starting January 26, 2024 – any new database instances will default to using the rds-ca-rsa2048-g1 certificate. If you wish for new instances to use a different certificate, you can specify which certificate to use with the AWS console or the AWS CLI. For more information, see the create-db-instanceAPI documentation.
Except for Amazon RDS for SQL Server, most modern RDS and Aurora engines support certificate rotation without a database restart in the latest versions. Call describe-db-engine-versions and check for the response field SupportsCertificateRotationWithoutRestart. If this field is set to true, then your instance will not require a database restart for CA update. If set to false, a restart will be required. For more information, see Setting the CA for your database in the AWS documentation.
Your rotated CA signs the DB server certificate, which is installed on each DB instance. The DB server certificate identifies the DB instance as a trusted server. The validity of DB server certificate depends on the DB engine and version either 1 year or 3 year. If your CA supports automatic server certificate rotation, RDS automatically handles the rotation of the DB server certificate too. For more information about DB server certificate rotation, see Automatic server certificate rotation in the AWS documentation.
You can choose to use the 40-year validity certificate (rds-ca-rsa2048-g1) or the 100-year certificates. The expiring CA used by your RDS instance uses the RSA2048 key algorithm and SHA256 signing algorithm. The rds-ca-rsa2048-g1 uses the exact same configuration and therefore is best suited for compatibility. The 100-year certificates (rds-ca-rsa4096-g1 andrds-ca-ecc384-g1) use more secure encryption schemes than rds-ca-rsa2048-g1. If you want to use them, you should test well in pre-production environments to double-check that your database client and server support the necessary encryption schemes in your Region.
Just Do It Now! Even if you have one year left until your certificate expires, you should start planning with your team. Updating SSL/TLS certificate may require restart your DB instance before the expiration date. We strongly recommend that you schedule your applications to be updated before the expiry date and run tests on a staging or pre-production database environment before completing these steps in a production environments. To learn more about updating SSL/TLS certificates, see Amazon RDS User Guide and Amazon Aurora User Guide.
If you don’t use SSL/TLS connections, please note that database security best practices are to use SSL/TLS connectivity and to request certificate verification as part of the connection authentication process. To learn more about using SSL/TLS to encrypt a connection to your DB instance, see Amazon RDS User Guide and Amazon Aurora User Guide.
If you have questions or issues, contact your usual AWS Support by your Support plan.
Internet Travel Solutions, LLC (ITS) is a travel management company that develops and maintains smart products and services for the corporate, commercial, and cargo sectors. ITS streamlines travel bookings for companies of any size around the world. It provides an intuitive consumer site with an integrated view of your travel and expenses.
ITS had been using monolithic architectures to host travel applications for years. As demand grew, applications became more complex, difficult to scale, and challenging to update over time. This slowed down deployment cycles.
Building a microservices-based air travel search engine
Typically, when a customer accesses the search widget on the consumer site, they select their origin, destination, and travel dates. Then, flights matching these search criteria are displayed. Data is retrieved from the backend database, and multiple calls are made to the Global Distribution System and external partner’s APIs, which typically takes 10-15 seconds. ITS then uses proprietary logic combined with business policies to curate the best results for the user. The existing monolith system worked well for normal workloads. However, when the number of concurrent user requests increased, overall performance of the application degraded.
In order to enhance the user experience, significantly accelerate search speed, and advance ITS’ modernization initiative, ITS chose to restructure their air travel application into microservices. The key goals in rearchitecting the application are:
To break down search components into logical units
To reduce database load by serving transient requests through memory-based storage
To decrease application logic processing on ITS’ side to under 3 seconds
Overview of the solution
To begin, we decompose our air travel search engine into microservices (for example, search, list, PriceGraph, and more). Next, we containerize the application to simplify and optimize system utilization by running these microservices using AWS Fargate, a serverless compute option on Amazon ECS.
Every search call processes about 30-60 MB of data in varying formats from different data stores. We use a new JSON-based data format to streamline varying data formats and store this data in Amazon ElastiCache for Redis, an in-memory data store that provides sub-millisecond latency and data structure flexibility. Additionally, some of the static data used by our air travel search application was moved to Amazon DynamoDB for faster retrieval speeds.
Figure 1. ITS’ microservice architecture, using AWS
ITS’ modernized architecture has several benefits beyond reducing operational expenses (OpEx). Some of these advantages include:
Agility. This architecture streamlines development, testing, and deploying changes on individual components, leading to faster iterations and shorter time-to-market (TTM).
Scalability. The managed scaling feature of AWS Fargate eliminates the need to worry about cluster autoscaling when setting up capacity providers. Amazon ECS actively oversees the task lifecycle and health status, responding to unexpected occurrences like crashes or freezes by initiating tasks as necessary to fulfill our service demands. This capability enhances resource utilization, ensures business continuity, and lowers overall total cost of ownership (TCO), letting the application owner focus on business needs.
Improved performance. Integrating Amazon ElastiCache for Redis with Amazon ECS on AWS Fargate to cache frequently accessed data significantly improves search response times and lowers load on backend services.
Centralized configuration management. Decoupling configuration parameters like database connection, strings, and environment variables from application code by integrating AWS Systems Manager Parameter Store, also provides consistency across tasks.
Results and metrics
ITS designed this architecture, tested, and implemented it in their production environment. ITS benchmarked this solution against their monolith application under varying factors for four months and noticed a significant improvement in air travel search speeds and overall performance. Here are the results:
Single User
Non-cloud airlist page round trip (RT)
Cloud airlist page RT
Leg 1
Leg 2
Leg 1
Leg 2
Test 1
29 secs
17 secs
11 secs
2 secs
Test 2
24 secs
11 secs
11.8 secs
1 sec
Test 3
24 secs
12 secs
14 secs
1 sec
Table 1. Monolithic versus modernized architecture response times
Searching round trip (RT) flights in the old system resulted in an average runtime of 27 seconds for the first leg, and 12 seconds for the return leg. With the new system, the average time is 12 seconds for the first leg and 1.3 seconds for the return leg. This is a combined improvement of 72%
Note that this time includes the trip time for our calls to reach an external vendor and receive inventory back. This usually ranges from 6 to 17 seconds, depending on the third-party system performance. Leg 2 performance for our new system is significantly faster (between 1-2 seconds). This is because search results are served directly from the Amazon ElastiCache for Redis in-memory datastore, rather than querying backend databases. This decreases load on the database, enabling it to handle more complex and resource-intensive operations efficiently.
Table 2 shows the results of endurance tests:
Endurance Test
Cloud airlist page RT
Leg 1
Leg 2
50 Users in 10 minutes
14.01 secs
4.48 secs
100 Users in 15 minutes
14.47 secs
13.31 secs
Table 2. Endurance test
Table 3 shows the results of spike tests:
Spike Test
Cloud airlist page RT
Leg 1
Leg 2
10 Users
12.34 secs
9.41 secs
20 Users
11.97 secs
10.55 secs
30 Users
15 secs
7.75 secs
Table 3. Spike test
Conclusion
In this blog post, we explored how Internet Travel Solutions, LLC (ITS) is using Amazon ECS on AWS Fargate, Amazon ElastiCache for Redis, and other services to containerize microservices, reduce costs, and increase application performance. This results in a vastly improved search results speed. ITS overcame many technical complexities and design considerations to modernize its air travel search engine.
SQL databases in Amazon Web Services (AWS), using services like Amazon Relational Database Service (Amazon RDS) and Amazon Aurora, offer software architects scalability, automated management, robust security, and cost-efficiency. This combination simplifies database management, improves performance, enhances security, and allows architects to create efficient and scalable software systems.
In this post, we introduce caching strategies and continue with real case studies that use services like Amazon ElastiCache or Amazon MemoryDB in real workloads where customers share the reasoning behind their approaches. It’s very important to understand the context for leveraging a specific solution or pattern, and these resources answer many commonly asked questions.
For software architects and developers, striking the right balance between operational complexity and cost efficiency is a perpetual challenge. Often, provisioning a separate database for each workload is the gold standard, offering unmatched isolation and granular operational controls. However, it’s not always the most cost-effective or operationally manageable approach. Through a real-world success story, we explore how Aurora played a pivotal role in helping VMware Aria Cost, powered by CloudHealth, consolidate a staggering 166 self-managed MySQL databases onto 62 Aurora clusters.
Amazon RDS Blue/Green Deployments revolutionizes the way you handle database updates, ensuring safety and simplicity, often achieving rapid updates in just a minute, with zero data loss. Meanwhile, Amazon RDS Optimized Writes turbocharges write transaction throughput by as much as double, without any additional extra cost. Amazon RDS Optimized Reads steps in to deliver a significant boost to database performance, processing queries up to 50% faster.
Discover how to leverage these capabilities of Amazon RDS in this one-hour video from re:Invent 2022.
In the world of mission-critical workloads, the importance of a robust disaster recovery (DR) strategy cannot be overstated. It’s the lifeline that ensures databases stay operational, even in the face of unexpected events. Discover the intricacies of crafting a dependable, cross-Region DR strategy tailored to Amazon RDS for SQL Server.
In this AWS Developers session, we uncover the best practices for efficiently managing and monitoring these cross-Region read replicas. From proactive monitoring to fine-tuning, you’ll gain the insights needed to keep your DR strategy finely tuned.
Aurora represents a paradigm shift in relational databases, boasting an architecture that decouples computational processes from data storage. It introduces advanced features, such as Global Database and low-latency read replicas, redefining the landscape of database management.
This modern database service excels in performance, scalability, and high availability on a large scale, offering compatibility with both MySQL and PostgreSQL open-source editions. Additionally, it provides an array of developer tools tailored for serverless and machine learning-driven applications.
This re:Invent 2022 session is an in-depth exploration of some of Aurora’s most compelling features, including Aurora Serverless v2 and Global Database. We also share the most recent innovations aimed at enhancing performance, scalability, and security while streamlining operational processes.
Dr. Werner Vogels wrote Farewell EC2-Classic, it’s been swell, celebrating the 17 years of loyal duty of the original version that started what we now know as cloud computing. You can read how it made the process of acquiring compute resources simple, even though the stack running behind the scenes was incredibly complex.
We have come a long way since 2006, and we’re not done innovating for our customers. As celebrated in this year’s AWS Storage Day, Amazon EBS was launched 15 years ago this month. James Hamilton, SVP and distinguished engineer at Amazon, wrote Amazon EBS at 15 Years, about how the service has evolved to handle over 100 trillion I/O operations a day, and transfers over 13 exabytes of data daily.
As Dr. Werner said in his piece, “it’s a reminder that building evolvable systems is a strategy, and revisiting your architectures with an open mind is a must.” Our innovation efforts driven by customer feedback continue today, and this week is no different.
Last Week’s Launches Here are some launches that got my attention:
Renaming Amazon Kinesis Data Analytics to Amazon Managed Service for Apache Flink – You can now use Amazon Managed Service for Apache Flink, a fully managed and serverless service for you to build and run real-time streaming applications using Apache Flink. All your existing running applications in Kinesis Data Analytics will work as-is, without any changes. To learn more, see my blog post.
Extended Support for Amazon Aurora and Amazon RDS – You can now get more time for support, up to three years, for Amazon Aurora and Amazon RDS database instances running MySQL 5.7, PostgreSQL 11, and higher major versions. This e will allow you time to upgrade to a new major version to help you meet your business requirements even after the community ends support for these versions.
Enhanced Starter Template for AWS Step Functions Workflow Studio – You can now use starter templates to streamline the process of creating and prototyping workflows swiftly, plus a new code mode, which enables builders to move easily between design and code authoring views. With the improved authoring experience in Workflow Studio, you can seamlessly alternate between a drag-and-drop visual builder experience or the new code editor so that you can pick your preferred tool to accelerate development.
Email Delivery History for Every Email in Amazon SES – You can now troubleshoot individual email delivery problems, confirm delivery of critical messages, and identify engaged recipients on a granular, single email basis. Email senders can investigate trends in delivery performance and see delivery and engagement status for each email sent using Amazon SES Virtual Deliverability Manager.
Response Streaming through Amazon SageMaker Real-time Inference – You can now continuously stream inference responses back to the client to help you build interactive experiences for various generative AI applications such as chatbots, virtual assistants, and music generators.
Other AWS News Some other updates and news that you might have missed:
AI & Sports: How AWS & the NFL are Changing the Game – Over the last 5 years, AWS has partnered with the National Football League (NFL), helping fans better understand the game, helping broadcasters tell better stories, and helping teams use data to improve operations and player safety. Watch AWS CEO, Adam Selipsky, former NFL All-Pro Larry Fitzgerald, and the NFL Network’s Cynthia Frelund during their earlier livestream discussing the intersection of artificial intelligence and machine learning in sports.
Amazon Bedrock Story from Amazon Science – This is a good article explaining the benefits of using Amazon Bedrock to build and scale generative AI applications with leading foundation models, including Amazon’s Titan FMs, which focus on responsible AI to avoid toxic content.
Amazon EC2 Flexibility Score– This is an open source tool developed by AWS to assess any configuration used to launch instances through an Auto Scaling Group (ASG) against the recommended EC2 best practices. It converts the best practice adoption into a “flexibility score” that can be used to identify, improve, and monitor the configurations.
To learn more open-source news and updates, see this newsletter curated by my colleague Ricardo to bring you the latest open source projects, posts, events, and more.
Upcoming AWS Events Check your calendars and sign up for these AWS events:
AWS re:Invent – Ready to start planning your re:Invent? Browse the session catalog now. Join us to hear the latest from AWS, learn from experts, and connect with the global cloud community.
AWS Global Summits – The last in-person AWS Summit will be held in Johannesburg on Sept. 26.
AWS Community Days– Join a community-led conference run by AWS user group leaders in your region: Aotearoa (Sept. 6), Lebanon (Sept. 9), Munich (Sept. 14), Argentina (Sept. 16), Spain (Sept. 23), and Chile (Sept. 30). Visit the landing page to check out all the upcoming AWS Community Days.
CDK Day – A community-led fully virtual event on Sept. 29 with tracks in English and Spanish about CDK and related projects. Learn more at the website.
The post Archive and Purge Data for Amazon RDS for PostgreSQL and Amazon Aurora with PostgreSQL Compatibility using pg_partman and Amazon S3 proposes data archival as a critical part of data management and shows how to efficiently use PostgreSQL’s native range partition to partition current (hot) data with pg_partman and archive historical (cold) data in Amazon Simple Storage Service (Amazon S3). Customers need a cloud-native automated solution to archive historical data from their databases. Customers want the business logic to be maintained and run from outside the database to reduce the compute load on the database server. This post proposes an automated solution by using AWS Glue for automating the PostgreSQL data archiving and restoration process, thereby streamlining the entire procedure.
AWS Glue is a serverless data integration service that makes it easier to discover, prepare, move, and integrate data from multiple sources for analytics, machine learning (ML), and application development. There is no need to pre-provision, configure, or manage infrastructure. It can also automatically scale resources to meet the requirements of your data processing job, providing a high level of abstraction and convenience. AWS Glue integrates seamlessly with AWS services like Amazon S3, Amazon Relational Database Service (Amazon RDS), Amazon Redshift, Amazon DynamoDB, Amazon Kinesis Data Streams, and Amazon DocumentDB (with MongoDB compatibility) to offer a robust, cloud-native data integration solution.
The features of AWS Glue, which include a scheduler for automating tasks, code generation for ETL (extract, transform, and load) processes, notebook integration for interactive development and debugging, as well as robust security and compliance measures, make it a convenient and cost-effective solution for archival and restoration needs.
Solution overview
The solution combines PostgreSQL’s native range partitioning feature with pg_partman, the Amazon S3 export and import functions in Amazon RDS, and AWS Glue as an automation tool.
The solution involves the following steps:
Provision the required AWS services and workflows using the provided AWS Cloud Development Kit (AWS CDK) project.
Set up your database.
Archive the older table partitions to Amazon S3 and purge them from the database with AWS Glue.
Restore the archived data from Amazon S3 to the database with AWS Glue when there is a business need to reload the older table partitions.
The solution is based on AWS Glue, which takes care of archiving and restoring databases with Availability Zone redundancy. The solution is comprised of the following technical components:
An S3 bucket stores Python scripts and database archives.
An S3 Gateway endpoint allows Amazon RDS and AWS Glue to communicate privately with the Amazon S3.
AWS Glue uses a Secrets Manager interface endpoint to retrieve database secrets from Secrets Manager.
AWS Glue ETL jobs run in either private subnet. They use the S3 endpoint to retrieve Python scripts. The AWS Glue jobs read the database credentials from Secrets Manager to establish JDBC connections to the database.
You can create an AWS Cloud9 environment in one of the private subnets available in your AWS account to set up test data in Amazon RDS. The following diagram illustrates the solution architecture.
Prerequisites
For instructions to set up your environment for implementing the solution proposed in this post, refer to Deploy the application in the GitHub repo.
Provision the required AWS resources using AWS CDK
Complete the following steps to provision the necessary AWS resources:
Clone the repository to a new folder on your local desktop.
Create a virtual environment and install the project dependencies.
The CDK project includes three stacks: vpcstack, dbstack, and gluestack, implemented in the vpc_stack.py, db_stack.py, and glue_stack.py modules, respectively.
These stacks have preconfigured dependencies to simplify the process for you. app.py declares Python modules as a set of nested stacks. It passes a reference from vpcstack to dbstack, and a reference from both vpcstack and dbstack to gluestack.
gluestack reads the following attributes from the parent stacks:
The S3 bucket, VPC, and subnets from vpcstack
The secret, security group, database endpoint, and database name from dbstack
The deployment of the three stacks creates the technical components listed earlier in this post.
Archive the historical table partition to Amazon S3 and purge it from the database with AWS Glue
The “Maintain and Archive” AWS Glue workflow created in the first step consists of two jobs: “Partman run maintenance” and “Archive Cold Tables.”
The “Partman run maintenance” job runs the Partman.run_maintenance_proc() procedure to create new partitions and detach old partitions based on the retention setup in the previous step for the configured table. The “Archive Cold Tables” job identifies the detached old partitions and exports the historical data to an Amazon S3 destination using aws_s3.query_export_to_s3. In the end, the job drops the archived partitions from the database, freeing up storage space. The following screenshot shows the results of running this workflow on demand from the AWS Glue console.
Additionally, you can set up this AWS Glue workflow to be triggered on a schedule, on demand, or with an Amazon EventBridge event. You need to use your business requirement to select the right trigger.
Restore archived data from Amazon S3 to the database
The “Restore from S3” Glue workflow created in the first step consists of one job: “Restore from S3.”
This job initiates the run of the partman.create_partition_time procedure to create a new table partition based on your specified month. It subsequently calls aws_s3.table_import_from_s3 to restore the matched data from Amazon S3 to the newly created table partition.
To start the “Restore from S3” workflow, navigate to the workflow on the AWS Glue console and choose Run.
The following screenshot shows the “Restore from S3” workflow run details.
Validate the results
The solution provided in this post automated the PostgreSQL data archival and restoration process using AWS Glue.
You can use the following steps to confirm that the historical data in the database is successfully archived after running the “Maintain and Archive” AWS Glue workflow:
On the Amazon S3 console, navigate to your S3 bucket.
Confirm the archived data is stored in an S3 object as shown in the following screenshot.
From a psql command line tool, use the \dt command to list the available tables and confirm the archived table ticket_purchase_hist_p2020_01 does not exist in the database.
You can use the following steps to confirm that the archived data is restored to the database successfully after running the “Restore from S3” AWS Glue workflow.
From a psql command line tool, use the \dt command to list the available tables and confirm the archived table ticket_history_hist_p2020_01 is restored to the database.
Clean up
Use the information provided in Cleanup to clean up your test environment created for testing the solution proposed in this post.
Summary
This post showed how to use AWS Glue workflows to automate the archive and restore process in RDS for PostgreSQL database table partitions using Amazon S3 as archive storage. The automation is run on demand but can be set up to be trigged on a recurring schedule. It allows you to define the sequence and dependencies of jobs, track the progress of each workflow job, view run logs, and monitor the overall health and performance of your tasks. Although we used Amazon RDS for PostgreSQL as an example, the same solution works for Amazon Aurora-PostgreSQL Compatible Edition as well. Modernize your database cron jobs using AWS Glue by using this post and the GitHub repo. Gain a high-level understanding of AWS Glue and its components by using the following hands-on workshop.
About the Authors
Anand Komandooru is a Senior Cloud Architect at AWS. He joined AWS Professional Services organization in 2021 and helps customers build cloud-native applications on AWS cloud. He has over 20 years of experience building software and his favorite Amazon leadership principle is “Leaders are right a lot.”
Li Liu is a Senior Database Specialty Architect with the Professional Services team at Amazon Web Services. She helps customers migrate traditional on-premise databases to the AWS Cloud. She specializes in database design, architecture, and performance tuning.
Neil Potter is a Senior Cloud Application Architect at AWS. He works with AWS customers to help them migrate their workloads to the AWS Cloud. He specializes in application modernization and cloud-native design and is based in New Jersey.
Vivek Shrivastava is a Principal Data Architect, Data Lake in AWS Professional Services. He is a big data enthusiast and holds 14 AWS Certifications. He is passionate about helping customers build scalable and high-performance data analytics solutions in the cloud. In his spare time, he loves reading and finds areas for home automation.
An increasing number of software as a service (SaaS) providers are considering the move from single to multi-tenant to utilize resources more efficiently and reduce operational costs. This blog aims to inform customers of considerations when evaluating a transformation to multi-tenancy in the Amazon Web Services (AWS) Cloud. You’ll find valuable information on how to optimize your cloud-based SaaS design to reduce operating expenses, increase resiliency, and offer a high-performing experience for your customers.
Single versus multi-tenancy
In a multi-tenant architecture, resources like compute, storage, and databases can be shared among independent tenants. In contrast, a single-tenant architecture allocates exclusive resources to each tenant.
Let’s consider a SaaS product that needs to support many customers, each with their own independent deployed website. Using a single-tenant model (see Figure 1), the SaaS provider may opt to utilize a dedicated AWS account to host each tenant’s workloads. To contain their respective workloads, each tenant would have their own Amazon Elastic Compute Cloud (Amazon EC2) instances organized within an Auto Scaling group. Access to the applications running in these EC2 instances would be done via an Application Load Balancer (ALB). Each tenant would be allocated their own database environment using Amazon Relational Database Service (RDS). The website’s storage (consisting of PHP, JavaScript, CSS, and HTML files) would be provided by Amazon Elastic Block Store (EBS) volumes attached to the EC2 instances. The SaaS provider would have a control plane AWS account used to create and modify these tenant-specific accounts.
Figure 1. Single-tenant configuration
To transition to a multi-tenant pattern, the SaaS provider can use containerization to package each website, and a container orchestrator to deploy the websites across shared compute nodes (EC2 instances). Kubernetes can be employed as a container orchestrator, and a website would then be represented by a Kubernetes deployment and its associated pods. A Kubernetes namespace would serve as the logical encapsulation of the tenant-specific resources, as each tenant would be mapped to one Kubernetes namespace. The Kubernetes HorizontalPodAutoscaler can be utilized for autoscaling purposes, dynamically adjusting the number of replicas in the deployment on a given namespace based on workload demands.
When additional compute resources are required, tools such as the Cluster Autoscaler, or Karpenter, can dynamically add more EC2 instances to the shared Kubernetes Cluster. An ALB can be reused by multiple tenants to route traffic to the appropriate pods. For RDS, SaaS providers can use tenant-specific database schemas to separate tenant data. For static data, Amazon Elastic File System (EFS) and tenant-specific directories can be employed. The SaaS provider would still have a control plane AWS account that would now interact with the Kubernetes and AWS APIs to create and update tenant-specific resources.
This transition to a multi-tenant design utilizing Kubernetes, Amazon Elastic Kubernetes Service (EKS), and other managed services offers numerous advantages. It enables efficient resource utilization by leveraging containerization and auto-scaling capabilities, reducing costs, and optimizing performance (see Figure 2).
Figure 2. Multi-tenant configuration
EKS cluster sizing and customer segmentation considerations in multi-tenancy designs
A high concentration of SaaS tenants hosted within the same system results in a large “blast radius.” This means a failure within the system has the potential to impact all resident tenants. This situation can lead to downtime for multiple tenants at once. To address this problem, SaaS providers are encouraged to partition their customers amongst multiple AWS accounts, each with their own deployments of this multi-tenant architecture. The number of tenants that can be present in a single cluster is a determination that can only be made by the SaaS provider after weighing the risks. Compare the shared fate of some subset of their customers, against the possible efficiency benefits of a multi-tenant architecture.
EKS security
SaaS providers must evaluate whether it’s appropriate for them to make use of containers as a workload isolation boundary. This is of particular importance in multi-tenant Kubernetes architectures, given that containers running on a single Amazon EC2 instance will share the underlying Linux kernel. Security vulnerabilities place this shared resource (the EC2 instance) at risk from attack vectors from the host Linux instance. Risk is elevated when any container running in a Kubernetes Pod cluster initiates untrusted code. This risk is heightened if SaaS providers permit tenants to “bring their code”. Kubernetes is a single tenant orchestrator, but with a multi-tenant approach to SaaS architectures, a single instance of the Amazon EKS control plane will be shared among all the workloads running within a cluster. Amazon EKS considers the cluster as the hard isolation security boundary. Every Amazon EKS managed Kubernetes cluster is isolated in a dedicated single-tenant Amazon VPC. At present, hard multi-tenancy can only be implemented by provisioning a unique cluster for each tenant.
EFS considerations
A SaaS provider may consider EFS as the storage solution for the static content of the multiple tenants. This provides them with a straightforward, serverless, and elastic file system. Directories may be used to separate the content for each tenant. While this approach of creating tenant-specific directories in EFS provides many benefits, there may be challenges harvesting per-tenant utilization and performance metrics. This can result in operational challenges for providers that need to granularly meter per-tenant usage of resources. Consequently, noisy neighbors will be difficult to identify and remediate. To resolve this, SaaS providers should consider building a custom solution to monitor the individual tenants in the multi-tenant file system by leveraging storage and throughput/IOPS metrics.
RDS considerations
Multi-tenant workloads, where data for multiple customers or end users is consolidated in the same RDS database cluster, can present operational challenges regarding per-tenant observability. Both MySQL Community Edition and open-source PostgreSQL have limited ability to provide per-tenant observability and resource governance. AWS customers operating multi-tenant workloads often use a combination of ‘database’ or ‘schema’ and ‘database user’ accounts as substitutes. AWS customers should use alternate mechanisms to establish a mapping between a tenant and these substitutes. This will give you the ability to process raw observability data from the database engine externally. You can then map these substitutes back to tenants, and distinguish tenants in the observability data.
Conclusion
In this blog, we’ve shown what to consider when moving to a multi-tenancy SaaS solution in the AWS Cloud, how to optimize your cloud-based SaaS design, and some challenges and remediations. Invest effort early in your SaaS design strategy to explore your customer requirements for tenancy. Work backwards from your SaaS tenants end goals. What level of computing performance do they require? What are the required cyber security features? How will you, as the SaaS provider, monitor and operate your platform with the target tenancy configuration? Your respective AWS account team is highly qualified to advise on these design decisions. Take advantage of reviewing and improving your design using the AWS Well-Architected Framework. The tenancy design process should be followed by extensive prototyping to validate functionality before production rollout.
The US celebrated Independence Day last week on July 4 with fireworks and barbecues across the country. But fireworks weren’t the only thing that launched last week. Let’s have a look!
Last Week’s Launches Here are some launches that got my attention:
AWS Glue – AWS Glue Crawlers now supports Apache Iceberg tables. Apache Iceberg is an open-source table format for data stored in data lakes. You can now automatically register Apache Iceberg tables into AWS Glue Data Catalog by running the Glue Crawler. You can then query Glue Catalog Iceberg tables across various analytics engines and apply AWS Lake Formation fine-grained permissions when querying from Amazon Athena. Check out the AWS Glue Crawler documentation to learn more.
In addition, Amazon RDS for PostgreSQL Multi-AZ Deployments with two readable standbys now supports logical replication. With logical replication, you can stream data changes from Amazon RDS for PostgreSQL to other databases for use cases such as data consolidation for analytical applications, change data capture (CDC), replicating select tables rather than the entire database, or for replicating data between different major versions of PostgreSQL. Check out the Amazon RDS User Guide for more details.
Amazon CloudWatch – Amazon CloudWatch now supports Service Quotas in cross-account observability. With this, you can track and visualize resource utilization and limits across various AWS services from multiple AWS accounts within a region using a central monitoring account. You no longer have to track the quotas by logging in to individual accounts, instead from a central monitoring account, you can create dashboards and alarms for the AWS service quota usage across all your source accounts from a central monitoring account. Setup CloudWatch cross-account observability to get started.
Amazon SageMaker – You can now associate a SageMaker Model Card with a specific model version in SageMaker Model Registry. This lets you establish a single source of truth for your registered model versions, with comprehensive, centralized, and standardized documentation across all stages of the model’s journey on SageMaker, facilitating discoverability and promoting governance, compliance, and accountability throughout the model lifecycle. Learn more about SageMaker Model Cards in the developer guide.
Other AWS News Here are some additional blog posts and news items that you might find interesting:
Building generative AI applications for your startup – In this AWS Startups Blog post, Hrushikesh explains various approaches to build generative AI applications, and reviews their key component. Read the full post for the details.
Components of the generative AI landscape.
How Alexa learned to speak with an Irish accent – If you’re curious how Amazon researchers used voice conversation to generate Irish-accented training data in Alexa’s own voice, check out this Amazon Science Blog post.
AWS open-source news and updates – My colleague Ricardo writes this weekly open-source newsletter in which he highlights new open-source projects, tools, and demos from the AWS Community.
Upcoming AWS Events Check your calendars and sign up for these AWS events:
AWS Global Summits – Check your calendars and sign up for the AWS Summit close to where you live or work: Hong Kong (July 20), New York City (July 26), Taiwan (August 2-3), São Paulo (August 3), and Mexico City (August 30).
AWS Community Days – Join a community-led conference run by AWS user group leaders in your region: Malaysia (July 22), Philippines (July 29-30), Colombia (August 12), and West Africa (August 19).
AWS re:Invent (November 27 – December 1) – Join us to hear the latest from AWS, learn from experts, and connect with the global cloud community. Registration is now open.
This post is written by Enrico Liguori, Networking Solutions Architect, Hybrid Cloud and Sumeeth Siriyur, Sr. Hybrid Cloud Solutions Architect.
AWS Outposts is a fully managed service that brings the same AWS infrastructure, services, APIs, and tools to virtually any data center, colocation space, manufacturing floor, or on-premises facility where it might be needed. With Outposts, you can run some AWS services on-premises and connect to a broad range of services available in the local AWS Region. Outposts supports workloads requiring low latency, local data processing, data residency, and application migration.
Outposts capacity is driven as per your compute and storage requirements to run workloads. You can monitor Outposts resources using metrics gathered by Amazon CloudWatch. Using these metrics, you can effectively monitor and manage the Outposts resources as they would in the Region, levereging cloud native tools such as CloudWatch dashboards. Check the Monitoring best practices for AWS Outposts blog post to dive deep into the available monitoring options for Outposts.
CloudWatch dashboards are customizable home pages in the CloudWatch console that can be used to monitor resources running on Outposts in a single view. For example, you can monitor in a single pane the number Amazon EC2 instances used per EC2 instance type, the available capacity of Amazon EBS volumes and Amazon S3 buckets, and the operational status of the service link of Outposts.
As a you start deploying additional Outposts resources as a part of their capacity expansion, they must all be integrated and visualized within CloudWatch in an automated way. Traditionally CloudWatch dashboards are built manually and may be time consuming to tune. This post provides also an overview of building CloudWatch dashboards in an automated way using AWS Cloud Development Kit (AWS CDK).
Overview
CloudWatch metrics available to monitor Outposts resources and capacity
CloudWatch metrics for Outposts are available to customers in all public AWS Regions and AWS GovCloud (US) at no additional cost. We can classify the available metrics in two main categories:
To identify the metrics published under the service specific namespaces, we can leverage metadata in the form of tags. A tag is a label that you assign to an AWS resource and consists of a key and an optional value. For the purpose of the monitoring strategy described in this post, we use a tag that contains the OutpostID of the Outpost where the resource is deployed. In this way, we can easily filter the CloudWatch metrics that we would like to show in our dashboard.
The following sections describe two different methods to build a CloudWatch dashboard that includes the different types of metrics described so far. In both cases, we see how particularly useful the presence of tags is to identify the service-specific metrics.
Manual approach to building a CloudWatch dashboard for Outposts
This section describes a manual (i.e., non-automated) approach to building a dashboard that could summarize both the capacity utilization metrics and the service specific metrics for your resources running on Outposts.
The benefit of this approach is that we can implement a fully operational dashboard directly from the CloudWatch console. However, it will simultaneously require more effort to properly tune the dashboard to satisfy your monitoring requirements.
You can start creating the dashboard opening the CloudWatch console and following the steps listed in the public documentation.
To display a metric under AWS/Outposts namespace we can choose any of the widgets available. Based on the nature of the data, we can choose different types of Widgets such as Number, Line, Gauge, Explorer, or you can even build your own custom widget.
Together with the Widget type, we must select Outposts namespace in the metric graph dialog box and then navigate to the specific metric of interest.
In case we are creating the dashboard in a different account than the Outposts owner, we must select the right account in the View data drop-down menu to see the Outposts metric in which we are interested.
After selecting one or more metrics we can select Create widget button.
For the service specific metrics, we recommend using the explorer widget. In this way, we can utilize the tagging strategy described earlier to automatically identify the metrics belonging to the resources running on Outposts. Check the documentation page for a step-by-step guide for creating an explorer widget based on tags.
Automated outpost dashboard
After we’ve seen how to build a dashboard manually from the console, in this secton we describe an automated approach to deploy a dashboard for Outposts through AWS CDK.
AWS CDK is an open source software development framework to model and provision your cloud application resources using familiar programming languages, including TypeScript, JavaScript, Python, C#, and Java. For the solution in this post, we use Python.
Architecture overview
The AWS CDK stack described in this post, assumes that the resources running on Outposts (EC2 instances, S3 buckets, Application Load Balancers (ALBs), and RDS instances) are tagged using the tagging strategy described earlier.
Specifying a tag name and a tag value in a configuration file automatically discovers the resources with that tag and adds the related metrics to the CloudWatch dashboard.
Together with the service specific metrics, it creates a series of widgets that we can use to monitor the capacity available and utilized in each Outpost that belongs to the account where the script is running.
The workflow is made of the following phases:
The AWS CDK stack creates an AWS CodeCommit repository and uploads its own code into it. The code contains a series of modules, one for each section of the CloudWatch dashboard. A section of the dashboard contains one or more widgets showing the metrics of a specific service.
To maintain the CloudWatch dashboard always up-to-date with the resources matching the tag, it creates a pipeline in AWS CodePipeline that can dynamically create and or update the dashboard. The pipeline runs the code in the CodeCommit repository and is made of two stages. In the first one, the build stage, it builds the dependencies needed by the AWS CDK stack. In the second stage, the Deploy stage, it loads and runs the modules used to build the dashboard.
Each module contains the code to automatically discover the tagged resources of a specific service. This discovery phase uses standard AWS APIs called through the Python SDK Boto3.
Based on the results of the discovery phase, AWS CDK produces an AWS CloudFormation template containing the definition of the CloudWatch dashboard sections. The template is submitted to CloudFormation.
CloudFormation creates or, if already defined, updates the CloudWatch dashboard.
Together with the dashboard, the AWS CDK script also contains the definition of a CloudWatch Event that, once deployed, triggers the pipeline each time a resource tagged with the specified tag is created or destroyed.
Prerequisites
To implement the solution presented in this post, you must configure:
b. Go through the AWS CDK bootstrapping process. This is required only for the first time that we use AWS CDK in a specific AWS environment (an AWS environment is a combination of an AWS account and Region).
Step 3: Install the needed Python dependencies with:
$ pip install -r requirements.txt
Step 4: Modify the configuration file
Before deploying the stack, we must modify the configuration file to specify the tag we use for identifying our resources running on Outposts. Open the file with the name config.yaml with your preferred text editor and specify:
A name for the dashboard. The default name used is Automated-CloudWatch-Dashboard.
Replace <tag_name> placeholder following the tag_name variable with the tag name used to tag the resources that you want to include in the dashboard.
Replace <tag_value> placeholder under tag_values variable with the tag value that you used.
Here is an example config.yaml configuration file:
At the end of the deployment process, the pipeline that creates the dashboard is provisioned. You can now go to your CloudWatch console to view it.
Automated Outposts dashboard overview
Now that we have built our dashboard, let’s review each section:
Outpost capacity
The AWS CDK stacks define a capacity section for each Outpost available to the AWS account where the script runs.
In this section, we find four widgets showing metrics published under the AWS/Outpost namespace. The first widget shows for each EC2 instance type available on the Outposts the number of instances utilized and available for that instance type. In the second row, we can visualize the available capacity for the Amazon EBS volumes and for the S3 buckets. The last widget shows the operational status of the service link of Outposts.
2. EC2 instances
In this section of the dashboard, we find the metrics showing the CPU, Network, and Disk Utilization for an EC2 instance. It has defined a section of this type for each EC2 instance with a tag assigned matching the name and the value specified in the configuration file of the script.
3. Application Load Balancer
The ALB section aggregates metrics showing the operational status of a load balancer hosted on Outposts. A section of this type is defined for each ALB with an assigned tag matching the one specified in the configuration file.
4. S3 buckets
The S3 buckets section is defined only once and aggregates the utilization metrics for all S3 buckets with an assigned tag.
5. AutoScaling group
The AutoScaling group section can be used to monitor the number of instances in service in a specific AS group with a tag assigned. This section is defined once and can aggregate the metrics for multiple AutoScaling groups.
Clean up
To terminate the resources that we created in this post, run the following:
$ cdk destroy
Then, go to the Cloudformation console and delete the stack with the name “Deploy-AutomatedCloudWatchDashboard”.
Conclusion
In conclusion, this post demonstrates a manual way of creating CloudWatch Metrics dashboard using the CloudWatch console and an automated way using AWS CDK. The automated approach is also scalable by automatically discovering any new resources added to the existing Outposts in the your environment without any changes to the code.
With Amazon Relational Database Service (Amazon RDS), you can set up, operate, and scale a relational database in the AWS Cloud. Amazon RDS provides cost-efficient, resizable capacity for an industry-standard relational database and manages common database administration tasks.
If you use Amazon RDS for your workloads, you can now use Amazon GuardDutyRDS Protection to help detect threats to your data stored in Amazon Aurora databases. GuardDuty is a continuous security monitoring service that can help you identify and prioritize potential threats in your AWS environment. By analyzing and profiling RDS login activity to your Aurora databases, GuardDuty can detect threats, such as high severity brute force events, suspicious logins, access from Tor, and access by known threat actors.
In this post, we will provide an overview of how to get started with RDS Protection, dive into its finding types, and walk you through examples of how to investigate and remediate findings.
Overview of RDS Protection
RDS Protection in GuardDuty analyzes and profiles Amazon RDS login activity to identify potential threats to your data stored in Aurora databases by using a combination of threat intelligence and machine learning. At launch, RDS Protection supports Aurora MySQL versions 2.10.2 and 3.2.1 or later and Aurora PostgreSQL versions 10.17, 11.12, 12.7, 13.3, and 14.3 or later. An updated list of the supported engines and versions is available in the GuardDuty documentation. RDS Protection doesn’t require additional infrastructure, and you don’t need to configure, collect, or store RDS logs in your own account. RDS Protection is also designed to have no impact on the performance of your database instances so that you don’t have to worry about compromising performance to better secure your data stored in Amazon RDS.
When RDS Protection detects a suspicious or anomalous login attempt that indicates a potential threat to your database instance, GuardDuty generates a finding with details to help you quickly identify relevant information to assist in remediation. RDS Protection findings include details on both anomalous and normal login activity in addition to information such as database instance details, database user details, action information, and actor information. These findings are available to you in the GuardDuty console, AWS Command Line Interface (AWS CLI), and API, and all GuardDuty findings are sent to Amazon EventBridge and AWS Security Hub, giving you options to respond by sending alerts to chat or ticketing systems, or by using AWS Lambda and AWS Systems Manager for automatic remediation.
Enable RDS Protection
Getting started with RDS Protection is simple, and you can do it with just a few steps in the console. Both new and existing GuardDuty customers can take advantage of the GuardDuty RDS Protection 30-day free trial. You can turn RDS Protection on or off for each of your accounts in supported AWS Regions. If you already use GuardDuty, you will need to enable RDS Protection either in the console or CLI, or through the API. You will have the option to enable it in the account that you are currently in, or if you are using a GuardDuty delegated administrator account (as shown in Figure 1), you can enable it for all accounts in your AWS Organizations organization. You’ll also have the ability to auto-enable. The auto-enable feature helps ensure that RDS Protection is enabled for each new account added to your organization, without the need for you to configure anything in each member account. If you are turning on GuardDuty for the first time, RDS Protection is enabled by default.
After GuardDuty generates a finding, you will need to analyze the finding so that you understand the potential impact to your environment. We recommend that you familiarize yourself with the GuardDuty finding types. Understanding GuardDuty finding types can help you understand the types of activity that GuardDuty is looking for and help you prepare for how to respond if they occur in your environment.
As adversaries become more sophisticated, it becomes even more important for you to align to a common framework to understand the tactics, techniques, and procedures (TTPs) behind an individual event. GuardDuty aligns findings using the MITRE ATT&CK framework, which is a globally-accessible knowledge base of adversary tactics and techniques based on real-world observations. GuardDuty findings have a specific finding format that helps you understand the details of each finding. You can examine the Threat Purpose section of the GuardDuty finding types to see finding types associated with various MITRE ATT&CK tactics, including CredentialAccess and Discovery. This can help you identify and understand the type of activity associated with a finding.
For example, consider two finding types that seem similar: CredentialAccess:RDS/MaliciousIPCaller.SuccessfulLoginand Discovery:RDS/MaliciousIPCaller. The difference between them is the ThreatPurpose aspect, located at the beginning of the finding type. GuardDuty has determined that both are involved with MaliciousIPCaller, and the difference is the intent of the activity associated with each finding. CredentialAccess SuccessfulLogin indicates that there was a successful login to your RDS database from a known malicious IP address. Discovery indicates that a threat actor opened a connection to the database, but didn’t attempt to authenticate. This indicates scanning behavior, but it might not be targeted at RDS instances. For more information, see GuardDuty RDS Protection finding types.
GuardDuty uses threat intelligence and machine learning to continually monitor and identify potential threats in your environment. To understand how to investigate RDS Protection finding types, you need to understand the details of a finding type that are derived from machine learning. As shown in Figure 2, RDS Protection finding types have two sections: one that shows the unusual behavior and one that shows the normal, historical behavior. To determine this, GuardDuty uses machine learning models to evaluate API requests to your account and identify anomalous events that are associated with tactics used by adversaries. The machine learning model tracks various factors of the API request, such as the user that made the request, the location the request was made from, and the specific API that was requested. It also looks at information such as successfulLoginCount, failedLoginCount, and incompleteConnectionCount for anomalies based on login activity. For more information about anomalous activity in GuardDuty findings, see Anomalous behavior.
With RDS Protection, you now have an additional mechanism to gain insight into your Amazon RDS databases across your accounts to continuously monitor for suspicious activity. RDS Protection can alert you to suspicious activity in Amazon RDS, such as a potentially suspicious or anomalous login attempt, unusual pattern in a series of successful, failed, or incomplete login attempts, and unauthorized access to your database instance from a previously unseen internal or external actor. With this new feature, GuardDuty also extends support for finding types that you might already be familiar with that also apply to RDS databases. These finding types include calls to an RDS database API from a Tor node, or calls to an RDS database from a known malicious IP address, which can indicate that there are interactions with your RDS database from sources that are associated with known malicious activity.
Remediate RDS Protection findings
In this section, we describe two RDS Protection findings and how you can investigate and remediate them. Understanding how to remediate these findings can help you maintain the integrity of your database. We share recommendations that focus specifically on security groups, network access control lists (network ACLs), and firewall rules.
The CredentialAccess:RDS/AnomalousBehavior.SuccessfulLogin finding informs you that an anomalous successful login was observed on an RDS database in your AWS environment. It might indicate that a previous unseen user logged in to an RDS database for the first time. A common scenario involves an internal user logging in to a database that is accessed programmatically by applications and not by individual users. A potential malicious actor might have compromised and accessed the role on your RDS database. The default Severity for this finding varies, depending on the anomalous behavior associated with the finding.
Figure 3 shows an example of this finding.
Figure 3: Finding of an anomalous behavior successful login
How to remediate
If the activity is unexpected for the associated database, AWS recommends that you change the password of the associated database user, and review available audit logs for activity that the user performed. Medium and high severity findings might indicate an overly permissive access policy to the database, and user credentials might have been exposed or compromised. We recommend that you place the database in a private virtual private cloud (VPC), and limit the security group rules to allow traffic only from necessary sources. For more information, see Remediating potentially compromised database with successful login events.
We recommend that you take the following steps to remediate this finding:
Remediation step 1: Identify the affected database and user
Identify the affected database and user and confirm whether the behavior is expected or unexpected by looking through the GuardDuty finding details, which provide the name of the affected database instance and the corresponding user details. Use the findings to confirm if the behavior is expected or not—for example, the findings might help you identify a user who logs in to their database instance after a long time has passed; a user who logs in to their database instance only occasionally, such as a financial analyst who logs in each quarter; or a suspicious actor who is involved in a successful login attempt that isn’t authorized and potentially compromises the database instance. Review the IP address of the finding. Public IP addresses might signify overly permissive access if it’s not a known network associated with your account.
Figure 4: Finding with details showing Amazon RDS database instance and user details
If the behavior is unexpected, complete the following steps:
Restrict database instance access for the suspected accounts and the source of the login activity. For more information, see Remediating potentially compromised credentials and Restrict network access. You can identify the user in the RDS DB user details section within the finding panel in the console, or within the resource.rdsDbUserDetails of the findings JSON. These user details include user name, application used, database accessed, SSL version, and authentication method.
The following CLI command is an example of how to revoke access to a user in a MySQL database. If the behavior is unexpected, you can revoke the privileges while you assess if the user is malicious.
REVOKE CONNECTION_ADMIN ON *.* FROM 'fakeadmin'@'%';
You can revoke privileges from the user, but when taking this action, you should make sure that the user isn’t vital to your system and that revoking permissions won’t break your production or development application. The following CLI command is an example of how to revoke privileges from a user:
REVOKE ALL PRIVILEGES ON *.* FROM 'fakeadmin'@'%';
If you know that the user isn’t necessary for your database or application to function, then you can remove the user from the system. To make sure that your security team can run forensics, check your company’s incident response policy. If you need help getting started with incident response, see AWS sample incident response playbooks. The following CLI command is an example of how to remove a user:
DROP USER 'fakeadmin'@'%';
Let’s say that you find the behavior unexpected, but the user turns out to be the application user, and making a change to the database credential will break your application. You can use AWS Systems Manager to help in this scenario, in which the affected RDS user is the account that is tied to your application. In many cases, a password rotation can break your application, depending on how you connect. If you rotate the password without notifying your application, the application might require additional cascading changes. You could lose connectivity to your application because the credentials that your application is using to connect to your database didn’t change, and now you are experiencing an outage that will remain until you update the credentials. Systems Manager can tie into your application code to automatically update the rotated database credentials in your application. For more information, see Rotate Amazon RDS database credentials automatically with AWS Secrets Manager.
The following figure shows a CLI command to get a secret from Secrets Manager — for this example, we assume the secret is compromised.
Figure 5: Example compromised credentials
The following figures shows that we have a new set of credentials that replace our old credentials, as indicated by “CreatedDate”.
Figure 6: Example remediated credentials
Remediation step 3: Assess the impact and determine what information was accessed
To learn how to restrict IP access on a security group, see Control traffic to resources using security groups. You can identify the user in the RDS DB user details section within the finding panel in the console, or within the resource.rdsDbUserDetails of the findings JSON. These user details include user name, application used, database accessed, SSL version, and authentication method.
Remediation step 5: Perform root-cause analysis and determine the steps that potentially led to this activity
Implementing a lessons-learned framework and methodology can help improve your incident response capabilities and also help prevent the incident from recurring. By learning from each incident, you can help avoid repeating the same mistakes, exposures, or misconfigurations, which can both improve your security posture and reduce the time lost to preventable situations. To learn more about post-incident activity, see AWS Security Incident Response Guide.
The CredentialAccess:RDS/AnomalousBehavior.successfulBruteForce finding informs you that an anomalous login occurred that is indicative of a successful brute force event, as observed on an RDS database in your AWS environment. Before the anomalous successful login, a consistent pattern of unusual failed login attempts was observed. This indicates that the user and password associated with the RDS database in your account might have been compromised, and a potentially malicious actor might have accessed the RDS database. The Severity of this finding is high. Figure 7 shows an example of this finding.
Figure 7: Example of an anomalous successful brute force finding
How to remediate
This activity indicates that database credentials might have been exposed or compromised. We recommend that you change the password of the associated database user, and review available audit logs for activity performed by the potentially compromised user. A consistent pattern of unusual failed login attempts indicates an overly permissive access policy to the database, or that the database might also have been publicly exposed. AWS recommends that you place the database in a private VPC, and limit the security group rules to allow traffic only from necessary sources. For more information, see Remediating potentially compromised database with successful login events.
We recommend that you take the following steps to remediate this finding
Remediation step 1: Identify the affected database and user
The generated GuardDuty finding provides the name of the affected database instance and the corresponding user details. For more information, see Finding details.
Figure 8: Finding details showing Amazon RDS database instance and user details
Remediation step 2: Identify the source of the failed login attempts
In the generated GuardDuty finding, you can find the IP address, and if it was a public connection, the ASN organization in the Actor section of the finding panel. An autonomous system is a group of one or more IP prefixes (lists of IP addresses accessible on a network) run by one or more network operators that maintain a single, clearly-defined routing policy. Network operators need autonomous system numbers (ASNs) to control routing within their networks and to exchange routing information with other internet service providers.
Figure 9: Action and actor details related to GuardDuty brute force finding
Remediation step 3: Confirm that the behavior is unexpected
Examine if this activity represents an attempt to gain additional unauthorized access to the database instance as follows:
If the source is internal to your network, examine if an application is misconfigured and attempting a connection repeatedly.
If this is an external actor, examine whether the corresponding database instance is public facing or is misconfigured and thus allowing potential malicious actors to attempt to log in with common user names.
If the behavior is unexpected, complete the following steps:
As discussed previously for the CredentialAccess:RDS/AnomalousBehavior.SuccessfulLogin finding, you can restrict access to the database through credentials or network access:
Remediation step 5: Perform root-cause analysis and determine the steps that potentially led to this activity
By learning from each incident, you can help avoid repeating the same mistakes, exposures, or misconfigurations, which can both improve your security posture and reduce time lost to preventable situations.
Conclusion
In this post, you learned about the new GuardDuty RDS Protection feature and how to understand, operationalize, and respond to the new findings. You can enable this feature through the GuardDuty console, CLI, or APIs to start monitoring your Amazon RDS workloads today.
If you’ve created EventBridge rules to send findings from GuardDuty to a target, make sure that you’ve configured your rules to deliver the newly added findings. After you enable GuardDuty findings, consider creating IR playbooks, doing tabletops and AWS gamedays, and mapping out what you want to automate. For more information, see the AWS Security Incident Response Guide and AWS Incident Response Playbook resources. To gain hands-on experience with different AWS Security services, see AWS Activation Days. The Activation Days workshops begin with hands-on work with different services in sandbox accounts, and then take you through the steps to deploy them across your organization.
To make it more efficient for you to operate securely on AWS, we are committed to continually improving GuardDuty, and we value your feedback. If you have feedback about this post, submit comments in the Comments section below. If you have questions about this post, start a new thread on AWS re:Post or contact AWS Support.
Want more AWS Security news? Follow us on Twitter.
Amazon RDS now offers integration with Secrets Manager to manage master database credentials. You no longer have to manage master database credentials, such as creating a secret in Secrets Manager or setting up rotation, because Amazon RDS does it for you.
In this blog post, you will learn how to set up an Amazon RDS database instance and use the Secrets Manager integration to manage master database credentials. You will also learn how to set up alternating users rotation for application credentials.
Benefits of the integration
Managing Amazon RDS master database credentials with Secrets Manager provides the following benefits:
Amazon RDS automatically generates and helps secure master database credentials, so that you don’t have to do the heavy lifting of securely managing credentials.
Amazon RDS automatically stores and manages database credentials in Secrets Manager.
Amazon RDS rotates database credentials regularly without requiring application changes.
Secrets Manager helps to secure database credentials from human access and plaintext view.
Secrets Manager allows retrieval of database credentials using its API or the console.
In this blog post, we’ll show you how to use the console to do the following:
Manage master database credentials for new Amazon RDS instances in Secrets Manager. We will use the MySQL engine, but you can also use this process for other Amazon RDS database engines.
Use the managed master database secret to set up alternating users rotation for a new database user.
Manage Amazon RDS master database credentials in Secrets Manager
In this section, you will create a database instance with Secrets Manager integration.
To manage Amazon RDS master database credentials in Secrets Manager:
For Choose a database creation method, choose Standard create.
In Engine options, for Engine type, choose MySQL.
In Settings, under Credentials Settings, select Manage master credentials in AWS Secrets Manager.
Figure 1: Select Secrets Manager integration
You will have the option to encrypt the managed master database credentials. In this example, we will use the default KMS key.
Figure 2: Choose KMS key
(Optional) Choose other settings to meet your requirements. For more information, see Settings for DB instances.
Choose Create Database, and wait a few minutes for the database to be created.
After the database is created, from the Instances dashboard in the Amazon RDS console, navigate to your new Amazon RDS instance.
Choose the Configuration tab, and under Master Credentials ARN, you will find the secret that contains your master database credentials.
Create a new database user by using the master database credentials
In this section you will learn how to create and secure a credential that could be used in your application to connect to the database. You will learn how to access the master database credentials and use the master database credentials to create and set up rotation on child (application) credentials.
To create a new database user by using the master database credentials
Retrieve the master database credentials from Secrets Manager as follows:
Choose the Configuration tab of your RDS instance dashboard, and under Master Credentials ARN, choose Manage in Secrets Manager to open your managed master database secret in Secrets Manager.
Figure 3: View DB configuration
You can see that Amazon RDS has added some system tags to the secret and that rotation is turned on by default.
Figure 4: View secret details
To see the password, in the Secret value section, choose Retrieve secret value.
For the master database, create a new database user with the permissions that you want by running the following SQL command. Make sure to replace <password> with your own information, and make sure to use a strong password.
For Secret type, select Credentials for Amazon RDS database.
In the Credentials section, enter the username and password of the new database user.
In the Database section, select your Amazon RDS instance, and then choose Next, as shown in Figure 5.
Figure 5: Select the RDS instance
On the Configure secret page, give the secret a name and description. No other configuration is needed.
On the Configure rotation – optional page, turn on Automatic rotation.
Figure 6: Select automatic rotation
In the Rotation schedule section, configure the rotation schedule according to your needs.
In the Rotation function section, do the following:
Enter a descriptive name for the Lambda function that will be created.
For Use separate credentials to rotate this secret, select Yes.
For Secrets, choose the master database secret that was created by Amazon RDS.
Note: To find the name of your master database secret, in the Amazon RDS console, on your Amazon RDS instance details page, choose the Configuration tab and then see the Master Credentials ARN.
Figure 7: Select separate credentials for rotation
Choose Next, and then on the Review page, choose Store.
It will take a few minutes for the Secrets Manager workflow to set up the rotation Lambda function before the new database user secret is ready to be rotated.
To check that rotation is enabled
In the Secrets Manager console, navigate to the new database user secret.
Figure 8: View the child secret
In the Rotation configuration section, verify that Rotation status is Enabled.
In the Rotation configuration section, choose the Lambda rotation function.
Figure 12: View the rotation function
In the Lambda console, under Application, select the application.
Figure 13: Open application
On the Deployments tab, choose CloudFormation stack.
Choose Delete and then follow the Delete menu steps. You might need to navigate to the root stack and choose Delete again. You might also need to disable termination protection for the stack. The console will guide you through that.
Figure 14: Choose delete
Now that you have cleaned up rotation for the new database user secret, you need to delete the child secret. Navigate to the Secrets Manager console and select the secret that you want to delete.
In the Actions dropdown, select Delete secret to delete the secret.
Figure 15: Delete child secret
Summary
Amazon RDS integration with Secrets Manager helps you better secure and manage master DB credentials. This integration helps you store the credentials when the DB instances are created and eliminates the effort for you to set up credential rotation.
In this blog post, you learned how to do the following:
Set up an Amazon RDS instance that uses Secrets Manager to store the master database credentials
View the credentials in Secrets Manager and confirm that rotation is set up
Use the master database credentials to create database user credentials
Set up alternating users rotation on database user credentials
Additional resources
For instructions on how to create database users for other Amazon RDS engine types, see the following resources:
If you are looking for a new year challenge, the Serverless Developer Advocate team launched the 30 days of Serverless. You can follow the hashtag #30DaysServerless on LinkedIn, Twitter, or Instagram or visit the challenge page and learn a new Serverless concept every day.
Last Week’s Launches Here are some launches that got my attention during the previous week.
List the URLs of the Amazon API Gateway or AWS Lambda function URL. $ sam list endpoints
List the outputs of the deployed stack. $ sam list outputs
List the resources in the local stack. If a stack name is provided, it also shows the corresponding deployed resources and the ids. $ sam list resources
Amazon RDS – Now supports increasing the allocated storage size when creating read replicas or when restoring a database from snapshots. This is very useful when your primary instances are near their maximum allocated storage capacity.
Amazon QuickSight – Allows you to create Radar charts. Radar charts are a way to visualize multivariable data that are used to plot one or more groups of values over multiple common variables.
AWS Systems Manager Automation – Now integrates with Systems Manager Change Calendar. Now you can reduce the risks associated with changes in your production environment by allowing Automation runbooks to run during an allowed time window configured in the Change Calendar.
Other AWS News Some other updates and news that you may have missed:
AWS Cloud Clubs – Cloud Clubs are peer-to-peer user groups for students and young people aged 18–28. In these clubs, you can network, attend career-building events, earn benefits like AWS credits, and more. Learn more about the clubs in your region in the AWS student portal.
Get AWS Certified: Profesional challenge – You can register now for the certification challenge. Prepare for your AWS Professional Certification exam and get a 50 percent discount for the certification exam. Learn more about the challenge on the official page.
Podcast Charlas Técnicas de AWS – If you understand Spanish, this podcast is for you. Podcast Charlas Técnicas is one of the official AWS podcasts in Spanish, and every other week, there is a new episode. The podcast is for builders, and it shares stories about how customers implemented and learned AWS services, how to architect applications, and how to use new services. You can listen to all the episodes directly from your favorite podcast app or at AWS Podcasts en Español.
AWS Open-Source News and Updates – This is a newsletter curated by my colleague Ricardo to bring you the latest open-source projects, posts, events, and more.
Upcoming AWS Events Check your calendars and sign up for these AWS events:
AWS re:Invent recaps – We had a lot of announcements during re:Invent. If you want to learn them all in your language and in your area, check the re: Invent recaps. All the upcoming ones are posted on this site, so check it regularly to find an event nearby.
AWS Innovate Data and AI/ML edition – AWS Innovate is a free online event to learn the latest from AWS experts and get step-by-step guidance on using AI/ML to drive fast, efficient, and measurable results.
AWS Innovate Data and AI/ML edition for Asia Pacific and Japan is taking place on February 22, 2023. Register here.
Registrations for AWS Innovate EMEA (March 9, 2023) and the Americas (March 14, 2023) will open soon. Check the AWS Innovate page for updates.
This blog is written by Mark Rogers, SDE II – Customer Engineering AWS.
In part 1, I showed you how to run Apache CloudStack with KVM on a single Amazon Elastic Compute Cloud (Amazon EC2) instance. That simple setup is great for experimentation and light workloads. In this post, things will get a lot more interesting. I’ll show you how to create an overlay network in your Amazon Virtual Private Cloud (Amazon VPC) that allows CloudStack to scale horizontally across multiple EC2 instances. This same method could work with other hypervisors, too.
If you haven’t read it yet, then start with part 1. It explains why this network setup is necessary. The same prerequisites apply to both posts.
Making things easier
I wrote some scripts to automate the CloudStack installation and OS configuration on CentOS 7. You can customize them to meet your needs. I also wrote some AWS CloudFormation templates you can copy in order to create a demo environment. The README file has more details.
The scalable method
Our team started out using a single EC2 instance, as described in my last post. That worked at first, but it didn’t have the capacity we needed. We were limited to a couple of dozen VMs, but we needed hundreds. We also needed to scale up and down as our needs changed. This meant we needed the ability to add and remove CloudStack hosts. Using a Linux bridge as a virtual subnet was no longer adequate.
To support adding hosts, we need a subnet that spans multiple instances. The solution I found is Virtual Extensible LAN (VXLAN). It’s lightweight, easy to configure, and included in the Linux kernel. VXLAN creates a layer 2 overlay network that abstracts away the details of the underlying network. It allows machines in different parts of a network to communicate as if they’re all attached to the same simple network switch.
Another example of an overlay network is an Amazon VPC. It acts like a physical network, but it’s actually a layer on top of other networks. It’s networks all the way down. VXLAN provides a top layer where CloudStack can sit comfortably, handling all of your VM needs, blissfully unaware of the world below it.
An overlay network comes with some big advantages. The biggest improvement is that you can have multiple hosts, allowing for horizontal scaling. Having more hosts not only gives you more computing power, but also lets you do rolling maintenance. Instead of putting the database and file storage on the management server, I’ll show you how to use Amazon Elastic File System (Amazon EFS) and Amazon Relational Database Service (Amazon RDS) for scalable and reliable storage.
EC2 Instances
Let’s start with three Amazon EC2 instances. One will be a router between the overlay network and your Amazon VPC, the second one will be your CloudStack management server, and the third one will be your VM host. You’ll also need a way to connect to your instances, such as a bastion host or a VPN endpoint.
The router won’t need much computing power, but it will need enough network bandwidth to meet your needs. If you put Amazon EFS in the same subnet as your instances, then they’ll communicate with it directly, thereby reducing the load on the router. Decide how much network throughput you want, and then pick a suitable Nitro instance type.
After creating the router instance, configure AWS to use it as a router. Stop source/destination checking in the instance’s network settings. Then update the applicable AWS route tables to use the router as the target for the overlay network. The router’s security group needs to allow ingress to the CloudStack UI (TCP port 8080) and any services you plan to offer from VMs.
For the management server, you’ll want a Nitro instance type. It’s going to use more CPU than your router, so plan accordingly.
In addition to being a Nitro type, the host instance must also be a metal type. Metal instances have hardware virtualization support, which is needed by KVM. If you have a new AWS account with a low on-demand vCPU limit, then consider starting with an m5zn.metal, which has 48 vCPUs. Otherwise, I suggest going directly to a c5.metal because it provides 96 vCPUs for a similar price. There are bigger types available depending on your compute needs, budget, and vCPU limit. If your account’s on-demand vCPU limit is too low, then you can file a support ticket to have it raised.
Networking
All of the instances should be on a dedicated subnet. Sharing the subnet with other instances can cause communication issues. For an example, refer to the following figure. The subnet has an instance named TroubleMaker that’s not on the overlay network. If TroubleMaker sends a request to the management instance’s overlay network address, then here’s what happens:
The request goes through the AWS subnet to the router.
The router forwards the request via the overlay network.
The CloudStack management instance has a connection to the same AWS subnet that TroubleMaker is on. Therefore, it responds directly instead of using the router. This isn’t the return path that AWS is expecting, so the response is dropped.
If you move TroubleMaker to a different subnet, then the requests and responses will all go through the router. That will fix the communication issues.
The instances in the overlay network will use special interfaces that serve as VXLAN tunnel endpoints (VTEPs). The VTEPs must know how to contact each other via the underlay network. You could manually give each instance a list of all of the other instances, but that’s a maintenance nightmare. It’s better to let the VTEPs discover each other, which they can do using multicast. You can add multicast support using AWS Transit Gateway.
Here are the steps to make VXLAN multicasts work:
Enable multicast support when you create the transit gateway.
Attach the transit gateway to your subnet.
Create a transit gateway multicast domain with IGMPv2 support enabled.
Associate the multicast domain with your subnet.
Configure the eth0 interface on each instance to use IGMPv2. The following sample code shows how to do this.
Make sure that your instance security groups allow ingress for IGMP queries (protocol 2 traffic from 0.0.0.0/32) and VXLAN traffic (UDP port 4789 from the other instances).
CloudStack VMs must connect to the same bridge as the VXLAN interface. As mentioned in the previous post, CloudStack cares about names. I recommend giving the interface a name starting with “eth”. Moreover, this naming convention tells CloudStack which bridge to use, thereby avoiding the need for a dummy interface like the one in the simple setup.
The following snippet shows how I configured the networking in CentOS 7. You must provide values for these variables:
$overlay_host_ip_address, $overlay_netmask, and $overlay_gateway_ip: Use values for the overlay network that you’re creating.
$multicast_address: The multicast address that you want VXLAN to use. Pick something in the multicast range that won’t conflict with anything else. I recommend choosing from the IPv4 local scope (239.255.0.0/16).
$interface_name: The name of the interface VXLAN should use to communicate with the physical network. This is typically eth0.
A couple of the steps are different for the router instance than for the other instances. Pay attention to the comments!
yum install -y bridge-utils net-tools

# IMPORTANT: Omit the GATEWAY setting on the router instance!
cat << EOF > /etc/sysconfig/network-scripts/ifcfg-cloudbr0
DEVICE=cloudbr0
TYPE=Bridge
ONBOOT=yes
BOOTPROTO=none
IPV6INIT=no
IPV6_AUTOCONF=no
DELAY=5
STP=no
USERCTL=no
NM_CONTROLLED=no
IPADDR=$overlay_host_ip_address
NETMASK=$overlay_netmask
DNS1=$dns_address
GATEWAY=$overlay_gateway_ip
EOF

cat << EOF > /sbin/ifup-local
#!/bin/bash
# Set up VXLAN once cloudbr0 is available.
if [[ \$1 == "cloudbr0" ]]
then
    ip link add ethvxlan0 type vxlan id 100 dstport 4789 group "$multicast_address" dev "$interface_name"
    brctl addif cloudbr0 ethvxlan0
    ip link set up dev ethvxlan0
fi
EOF

chmod +x /sbin/ifup-local

# Transit Gateway requires IGMP version 2
echo "net.ipv4.conf.$interface_name.force_igmp_version=2" >> /etc/sysctl.conf
sysctl -p

# Enable IPv4 forwarding
# IMPORTANT: Only do this on the router instance!
echo 'net.ipv4.ip_forward=1' >> /etc/sysctl.conf
sysctl -p

# Restart the network service to make the changes take effect.
systemctl restart network
Storage
Let’s look at storage. Create an Amazon RDS database using the MySQL 8.0 engine, and set a master password for CloudStack’s database setup tool to use. Refer to the CloudStack documentation to find the MySQL settings that you’ll need. You can put the settings in an RDS parameter group. In case you’re wondering why I’m not using Amazon Aurora, it’s because CloudStack needs the MyISAM storage engine, which isn’t available in Aurora.
I recommend Amazon EFS for file storage. For efficiency, create a mount target in the subnet with your EC2 instances. That will enable them to communicate directly with the mount target, thereby bypassing the overlay network and router. Note that the system VMs will use Amazon EFS via the router.
If you want, you can consolidate your CloudStack file systems. Just create a single file system with directories for each zone and type of storage. For example, I use directories named /zone1/primary, /zone1/secondary, /zone2/primary, etc. You should also consider enabling provisioned throughput on the file system, or you may run out of bursting credits after booting a few VMs.
One consequence of the file system’s scalability is that the amount of free space (8 exabytes) will cause an integer overflow in CloudStack! To avoid this problem, reduce storage.overprovisioning.factor in CloudStack’s global settings from 2 to 1.
When your environment is ready, install CloudStack. When it asks for a default gateway, remember to use the router’s overlay network address. When you add a host, make sure that you use the host’s overlay network IP address.
The security groups that you created for the instances, database, and file system
Conclusion
The approach I shared has many steps, but they’re not bad when you have a plan. Whether you need a simple setup for experiments, or you need a scalable environment for a data center migration, you now have a path forward. Give it a try, and comment here about the things you learned. I hope you find it useful and fun!
“Apache”, “Apache CloudStack”, and “CloudStack” are trademarks of the Apache Software Foundation.
This blog is written by Mark Rogers, SDE II – Customer Engineering AWS.
How do you put a cloud inside another cloud? Some features that make Amazon Elastic Compute Cloud (Amazon EC2) secure and wonderful also make running CloudStack difficult. The biggest obstacle is that AWS and CloudStack both want to manage network resources. Therefore, we must keep them out of each other’s way. This requires some steps that aren’t obvious, and it took a long time to figure out. I’m going to share what I learned, so that you can navigate the process more easily.
Apache CloudStack is an open-source platform for deploying and managing virtual machines (VMs) and the associated network and storage infrastructure. You would normally run it on your own hardware to create your own cloud. But there can be advantages to running it inside of an Amazon Virtual Private Cloud (Amazon VPC), including how it could help you migrate out of a data center. It’s a great way to create disposable environments for experiments or training. Furthermore, it’s a convenient way to test-drive the new CloudStack support in Amazon Elastic Kubernetes Service (Amazon EKS) Anywhere. In my case, I needed to create development and test environments for a project that uses the CloudStack API. The environments needed to be shared and scalable. Our build pipelines were already in AWS, so it made sense to put the new environments there, too.
CloudStack can work with a number of hypervisors. The instructions in this article will use Kernel-based Virtual Machine (KVM) on Linux. KVM will manage the VMs at a low level, and CloudStack will manage KVM.
Prerequisites
Most of the information in this article should be applicable to a range of CloudStack versions. I targeted CloudStack 4.14 on CentOS 7. I also tested CloudStack versions 4.16 and 4.17, and I recommend them.
The official CentOS 7 x86_64 HVM image works well. If you use a different Linux flavor or version, then you might have to modify some of the implementation details.
You’ll need to know the basics of CloudStack. The scope of this article is making CloudStack and AWS coexist peacefully. Once CloudStack is running, I’m assuming that you’ll handle things from there. Refer to the AWS documentation and CloudStack documentation for information on security and other best practices.
Making things easier
I wrote some scripts to automate the installation. You can run them on EC2 instances with CentOS 7, and they’ll do all the installation and OS configuration for you. You can use them as they are, or customize them to meet your needs. I also wrote some AWS CloudFormation templates you can copy in order to create a demo environment. The README file has more details.
I like c5.metal because it’s one of the least expensive metal types, and has a low cost per vCPU. It has 96 vCPUs and 192 GiB of memory. If you run 20 VMs on it, with 4 CPU cores and 8 GiB of memory each, then you’d still have 16 vCPUs and 32 GiB to share between the operating system, CloudStack, and MySQL. Using CloudStack’s overprovisioning feature, you could fit even more VMs if they’re running light loads.
Networking
The biggest challenge is the network. AWS knows which IP and MAC addresses should exist, and it knows the machines to which they should belong. It blocks any traffic that doesn’t fit its idea of how the network should behave. Simultaneously, CloudStack assumes that any IP or MAC address it invents should work just fine. When CloudStack assigns addresses to VMs on an AWS subnet, their network traffic gets blocked.
You could get around this by enabling network address translation (NAT) on the instance running CloudStack. That’s a great solution if it fits your needs, but it makes it hard for other machines in your Amazon VPC to contact your VMs. I recommend a different approach.
Although AWS restricts what you can do with its layer 2 network, it’s perfectly happy to let you run your own layer 3 router. Your EC2 instance can act as a router to a new virtual subnet that’s outside of the jurisdiction of AWS. The instance integrates with AWS just like a VPN appliance, routing traffic to wherever it needs to go. CloudStack can do whatever it wants in the virtual subnet, and everybody’s happy.
What do I mean by a virtual subnet? This is a subnet that exists only inside the EC2 instance. It consists of logical network interfaces attached to a Linux bridge. The entire subnet exists inside a single EC2 instance. It doesn’t scale well, but it’s simple. In my next post, I’ll cover a more complicated setup with an overlay network that spans multiple instances to allow horizontal scaling.
The simple way
The simple way is to put everything in one EC2 instance, including the database, file storage, and a virtual subnet. Because everything’s stored locally, allocate enough disk space for your needs. 500 GB will be enough to support a few basic VMs. Create or select a security group for your instance that gives users access to the CloudStack UI (TCP port 8080). The security group should also allow access to any services that you’ll offer from your VMs.
When you have your instance, configure AWS to treat it as a router.
a. Go to the VPC settings, and select Route Tables.
b. Identify the tables for subnets that need CloudStack access.
c. In each of these tables, add a route to the new virtual subnet. The route target should be your EC2 instance.
4. Depending on your network needs, you may also need to add routes to transit gateways, VPN endpoints, etc.
Because everything will be on one server, creating a virtual subnet is simply a matter of creating a Linux bridge. CloudStack must find a network adapter attached to the bridge. Therefore, add a dummy interface with a name that CloudStack will recognize.
The following snippet shows how I configure networking in CentOS 7. You must provide values for the variables $virutal_host_ip_address and $virtual_netmask to reflect the virtual subnet that you want to create. For $dns_address, I recommend the base of the VPC IPv4 network range, plus two. You shouldn’t use 169.654.169.253 because CloudStack reserves link-local addresses for its own use.
yum install -y bridge-utils net-tools

# The bridge must be named cloudbr0.

cat << EOF > /etc/sysconfig/network-scripts/ifcfg-cloudbr0
DEVICE=cloudbr0
TYPE=Bridge
ONBOOT=yes
BOOTPROTO=none
IPV6INIT=no
IPV6_AUTOCONF=no
DELAY=5
STP=yes
USERCTL=no
NM_CONTROLLED=no
IPADDR=$virtual_host_ip_address
NETMASK=$virtual_netmask
DNS1=$dns_address
EOF

# Create a dummy network interface.
cat << EOF > /etc/sysconfig/modules/dummy.modules
#!/bin/sh
/sbin/modprobe dummy numdummies=1
/sbin/ip link set name ethdummy0 dev dummy0
EOF

chmod +x /etc/sysconfig/modules/dummy.modules
/etc/sysconfig/modules/dummy.modules

cat << EOF > /etc/sysconfig/network-scripts/ifcfg-ethdummy0
TYPE=Ethernet
BOOTPROTO=none
NAME=ethdummy0
DEVICE=ethdummy0
ONBOOT=yes
BRIDGE=cloudbr0
NM_CONTROLLED=no
EOF

# Turn the instance into a router

echo 'net.ipv4.ip_forward=1' >> /etc/sysctl.conf
sysctl -p

# Must kill dhclient or the network service won't restart properly.
# A reboot would also work, if you’d rather do that.

pkill dhclient
systemctl restart network
CloudStack must know which IP addresses to use for inter-service communication. It will select by resolving the machine’s fully qualified domain name (FQDN) to an address. The following commands will make it to choose the right one. You must provide a value for $virtual_host_ip_address.
Remember that CloudStack is only directly connected to your virtual network. The EC2 instance is the router that connects the virtual subnet to the Amazon VPC. When you’re configuring CloudStack, use your instance’s virtual subnet address as the default gateway.
To access CloudStack from your workstation, you’ll need a connection to your VPC. This can be through a client VPN or a bastion host. If you use a bastion, its subnet needs a route to your virtual subnet, and you’ll need an SSH tunnel for your browser to access the CloudStack UI. The UI is at http://x.x.x.x:8080/client/, where x.x.x.x is your CloudStack instance’s virtual subnet address. Note that CloudStack’s console viewer won’t work if you’re using an SSH tunnel.
If you’re just experimenting with CloudStack, then I suggest saving money by stopping your instance when it isn’t needed. The safe way to do that is:
Disable your zone in the CloudStack UI.
Put the primary storage into maintenance mode.
Wait for the switch to maintenance mode to be complete.
Stop the EC2 instance.
When you’re ready to turn everything back on, simply reverse those steps. If you have any virtual routers in CloudStack, then you may need to start those, too.
Getting CloudStack to run on AWS isn’t so bad. The hardest part is simply knowing how. The setup explained here is great for small installations, but it can only scale vertically. In my next post, I’ll show you how to create an installation that scales horizontally. Instead of using a virtual subnet that exists in a single EC2 instance, we’ll build an overlay network that spans multiple instances. It will use more components and features, including some that might be new to you. I hope you find it interesting!
Now that you can create a simple setup, give it a try! I hope you have fun and learn something new along the way. Comment with the results of your experiments.
“Apache”, “Apache CloudStack”, and “CloudStack” are trademarks of the Apache Software Foundation.
We are half way between the re:Invent conference and the end-of-year holidays, and I did expect the cadence of releases and news to slow down a bit, but nothing is further away from reality. Our teams continue to listen to your feedback and release new capabilities and incremental improvements.
This week, many items caught my attention. Here is my summary.
The AWS Pricing Calculator for Amazon EC2 is getting a redesign to provide you with a simplified, consistent, and efficient calculator to estimate costs. It also added a way to bulk estimate costs for EC2 instances, EC2 Dedicated Hosts, and Amazon EBS services. Try it for yourself today.
Amazon CloudWatch Metrics Insights alarms now enables you to trigger alarms on entire fleets of dynamically changing resources (such as automatically scaling EC2 instances) with a single alarm using standard SQL queries. For example, you can now write a query like this to collect data about CPU utilization over your entire dynamic fleet of EC2 instances.
SELECT AVG(CPUUtilization) FROM SCHEMA("AWS/EC2", InstanceId)
AWS Amplify is a command line tool and a set of libraries to help you to build web and mobile applications connected to a cloud backend. We released Amplify Library for Android 2.0, with improvements and simplifications for user authentication. The team also released Amplify JavaScript library version 5, with improvements for React and React Native developers, such as a new notifications channel, also known as in-app messaging, that developers can use to display contextual messages to their users based on their behavior. The Amplify JavaScript library has also received improvements to reduce the overall bundle size and installation size.
Amazon RDS Proxynow supports PostgreSQL major version 14. RDS Proxy is a fully managed, highly available database proxy for Amazon Relational Database Service (Amazon RDS) that makes applications more scalable, more resilient to database failures, and more secure. It is typically used by serverless applications that can have a large number of open connections to the database server and may open and close database connections at a high rate, exhausting database memory and compute resources.
AWS Gateway Load Balancer endpoints now support Ipv6 addresses. You can now send IPv6 traffic through Gateway Load Balancers and its endpoints to distribute traffic flows to dual stack appliance targets.
Amazon Location Service now provides Open Data Maps maps, in addition to ESRI and Here maps. I also noticed that Amazon is a core member of the new Overture Maps Foundation, officially hosted by the Linux Foundation. The mission of the Overture Maps Foundation is to power new map products through openly available datasets that can be used and reused across applications and businesses. The program is driven by Amazon Web Services (AWS), Facebook’s parent company Meta, Microsoft, and Dutch mapping company TomTom.
X in Y. Jeff started this section a while ago to list the expansion of new services and capabilities to additional Regions. I noticed 11 Regional expansions this week:
Upcoming AWS Events Check your calendars and sign up for these AWS events:
AWS re:Invent recaps in your area. During the re:Invent week, we had lots of new announcements, and in the next weeks, you can find in your area a recap of all these launches. All the events will be posted on this site, so check it regularly to find an event nearby.
AWS re:Invent keynotes, leadership sessions, and breakout sessions are available on demand. I recommend that you check the playlists and find the talks about your favorite topics in one collection.
Stay Informed That is my selection for this week! Heads up – the Week in Review will be taking a short break for the end of the year, but we’ll be back with regular updates starting on January 9, 2023. To better keep up with all of this news, do not forget to check out the following resources:
The Official AWS Podcast – Listen each week for updates on the latest AWS news and deep dives into exciting use cases. There are also official AWS podcasts in your local languages. Check the ones in French, German, Italian, and Spanish.
Application migrations, especially from legacy/mainframe to the cloud, are done in phases that sometimes span multiple years. Each phase migrates a set of applications, data, and other resources to the cloud. During the transition phases, applications might require access to both on-premises and cloud-based resources to perform their function. While working with our customers, we observed that the most common resources that applications require access to are databases, file storage, and shared services.
This blog post includes architecture guidelines for setting up access to commonly used resources by building a security model in Amazon Web Services (AWS). As you move your legacy applications to the cloud, you can apply Zero Trust concepts and security best practices according to your security needs. With AWS, you can build strong identity and access management with centralized control and set up and manage guardrails and fine-grained access controls for your workforce and applications.
In large organizations, on-premises applications rely on mainframe-based security services, an Identity Provider (IdP) platform, or a combination of both.
A mainframe-based control facility enables on-premises applications to:
Identify and verify users.
Establish an authority (authorize users and backend programs to access protected resources) through privileges defined in the control facility.
The backend programs use a unique identifier (or surrogate key) and run under the authority defined by the privileges assigned to the unique identifier.This security mechanism needs to be transformed into a role-based security model in AWS as applications are moved to the cloud. You assign permissions to a role, which is assumed by an application to get access to resources in AWS, similar to an authority defined in the legacy environment.
An IdP platform (such as Octa or Ping Identify) provides capabilities such as centralized access management and identity federation using SAML 2.0 or OpenID Connect (OIDC), that builds a system of trust between on-premises IdP and AWS. Once the federation is set up, on-premises applications can access AWS resources using AWS Identity and Access Management (IAM) roles, as explained in the next section.
Setting up a scalable security model in AWS
Figure 1 shows an on-premises environment where enterprise identity management is integrated with the mainframe and provides authentication and authorization to applications running off the mainframe. Generally, mainframe-based security controls (users, resources, and profiles) are replicated to the enterprise identity platform and are kept in sync through a change data capture process.
Figure 1. Access to AWS resources from on-premises
To enable your on-premises applications to access AWS resources, the applications need valid AWS credentials for making AWS API requests. Avoid using long-term access keys (such as those associated with IAM users) because they remain valid until you remove them. The following two methods can be used to assume an IAM role and get temporary security credentials to gain access to the AWS resources:
SAML based Identity federation – AWS supports identity federation with SAML. It allows federated access to users and applications in your organization by assuming an IAM role created for SAML federation to get temporary credentials. This method is helpful:
If your application uses a service account to manage AWS resource access, regardless of who is logged in.
IAM Roles Anywhere – Your on-premises applications will exchange X.509 certificates so that they can assume a role and get temporary credentials. This method is helpful if your application needs access to an AWS resource based on a service account.
In both of these cases, authenticated requests assume an IAM role, get temporary security credentials, and perform certain actions using AWS command line interface (CLI) and AWS SDKs. The IAM role has attached permissions for AWS resources such as Amazon Simple Storage Service (Amazon S3), Amazon DynamoDB, and Amazon Relational Database Service (Amazon RDS).
The temporary credentials expire when the session expires. By default, the session duration is one hour; you can request longer duration and session refresh.
To understand better, let’s consider the use case in Figure 2, where on-premises applications need access to AWS resources.
Figure 2. Access to resources that are created or already migrated to AWS from on-premises
Applications can get temporary security credentials through SAML or IAM Roles Anywhere as explained earlier. The next sections explain setting up access to the resources in Figure 2 using temporary credentials.
1. Amazon S3
On-premises applications can access Amazon S3 using the REST API or the AWS SDK to perform certain actions (such as GetObjects or ListObjects):
You can also simplify by creating Amazon S3 access points for your application to perform object-level operations in your S3 bucket. Each access point has distinct permissions and network controls that S3 applies for any request made through it.
2. Amazon RDS and Amazon Aurora
AWS Secrets Manager helps you store credentials for Amazon RDS and Amazon Aurora. You can also set up automatic rotation of your database secrets to meet your security and compliance needs. Applications can retrieve secrets using AWS SDKs and AWS CLI.
Additional configuration values can be stored in AWS Systems Manager Parameter Store, which provides secure, hierarchical storage for configuration data management such as passwords, database strings and license codes as parameter values rather than hard coding them in the code.
To access Amazon RDS and Amazon Aurora:
You can launch Amazon RDS DB instances into a virtual private cloud (VPC). A client application can access DB instance through the internet or through the private network only using an established connection from on-premises to the AWS environment.
On-premises applications can connect to a relational database using a database driver such as Java Database Connectivity (JDBC). The application can retrieve database connection details (such as database URL, port, or credentials) from AWS Secrets Manager and AWS Systems Manager Parameter Store through API calls and can use them for the database connection.
Database admins can access AWS Management Console through an assumed role and can have access to database credentials from AWS Secrets Manager in order to connect directly with the database. For certain administration tasks (such as cluster setup, backup, recovery, maintenance, and management), they will need access to the Amazon RDS management console.
Amazon RDS also provides IAM database authentication option for MariaDB, MySQL, and PostgreSQL. You can authenticate without a password when you connect to a DB instance. Instead, you use an authentication token. For more information, go to IAM database authentication.
This blog helps you architect an application security model in AWS to provide on-premises access to commonly used resources in AWS.
You can apply security best practices and Zero Trust concepts as you move your legacy applications to the cloud. With AWS, you can build identity and access management with centralized and fine-grained access controls for your workforce and applications.
The world is asynchronous, is what Werner Vogels, Amazon CTO, reminded us during his keynote last week at AWS re:Invent. At the beginning of the keynote, he showed us how weird a synchronous world would be and how everything in nature is asynchronous. One example of an event-driven application he showcased during his keynote is Serverlesspresso, a project my team has been working on for the last year. And last week, we announced Serverlesspresso extensions, a new program that lets you contribute to Serverlesspresso and learn how event-driven applications can be extended.
Last Week’s Launches Here are some launches that got my attention during the previous week.
Amazon RDS Proxynow supports creating proxies in Amazon Aurora Global Database primary and secondary Regions. Now, building multi-Region applications with Amazon Aurora is simpler. RDS proxy sits between your application and the database pool and shares established database connections.
Other AWS News Some other updates and news that you may have missed:
I would like to recommend this really interesting Amazon Science article about federated learning. This is a framework that allows edge devices to work together to train a global model while keeping customers’ data on-device.
Podcast Charlas Técnicas de AWS – If you understand Spanish, this podcast is for you. Podcast Charlas Técnicas is one of the official AWS podcasts in Spanish, and every other week there is a new episode. Today the final episode for season three launched, and in it, we discussed many of the re:Invent launches. You can listen to all the episodes directly from your favorite podcast app or at AWS Podcasts en español.
AWS open-source news and updates–This is a newsletter curated by my colleague Ricardo to bring you the latest open-source projects, posts, events, and more.
Upcoming AWS Events Check your calendars and sign up for these AWS events:
AWS Resiliency Hub Activation Day is a half-day technical virtual session to deep dive into the features and functionality of Resiliency Hub. You can register for free here.
AWS re:Invent recaps in your area. During the re:Invent week, we had lots of new announcements, and in the next weeks you can find in your area a recap of all these launches. All the events will be posted on this site, so check it regularly to find an event nearby.
AWS re:Invent keynotes, leadership sessions, and breakout sessions are available on demand. I recommend that you check the playlists and find the talks about your favorite topics in one collection.
That’s all for this week. Check back next Monday for another Week in Review!
To provide the best experiences, we use technologies like cookies to store and/or access device information. Consenting to these technologies will allow us to process data such as browsing behavior or unique IDs on this site. Not consenting or withdrawing consent, may adversely affect certain features and functions.
Functional
Always active
The technical storage or access is strictly necessary for the legitimate purpose of enabling the use of a specific service explicitly requested by the subscriber or user, or for the sole purpose of carrying out the transmission of a communication over an electronic communications network.
Preferences
The technical storage or access is necessary for the legitimate purpose of storing preferences that are not requested by the subscriber or user.
Statistics
The technical storage or access that is used exclusively for statistical purposes.The technical storage or access that is used exclusively for anonymous statistical purposes. Without a subpoena, voluntary compliance on the part of your Internet Service Provider, or additional records from a third party, information stored or retrieved for this purpose alone cannot usually be used to identify you.
Marketing
The technical storage or access is required to create user profiles to send advertising, or to track the user on a website or across several websites for similar marketing purposes.
 I scroll down the page and select IBM Db2 Standard and Engine Version 11.5.9. Amazon RDS patches the database instances automatically if you so desire. You can learn more about Amazon RDS database maintenance here.


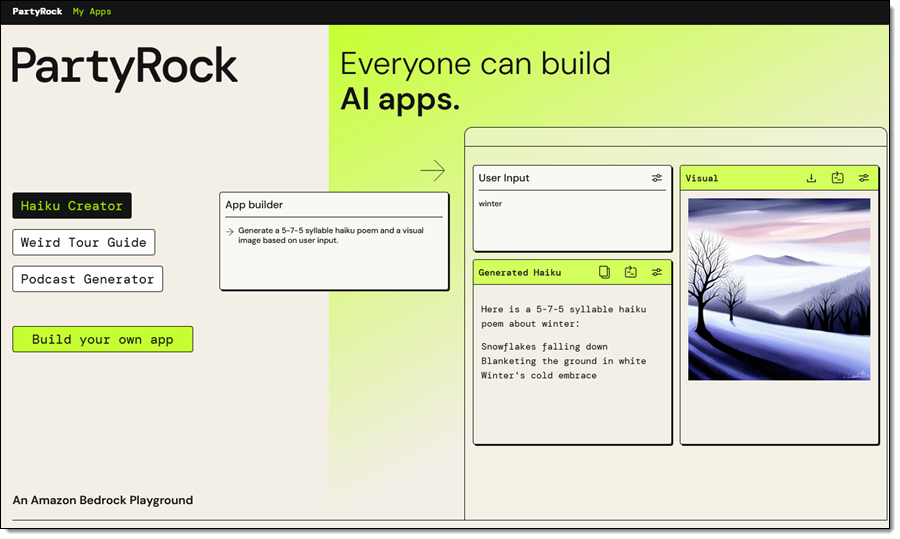
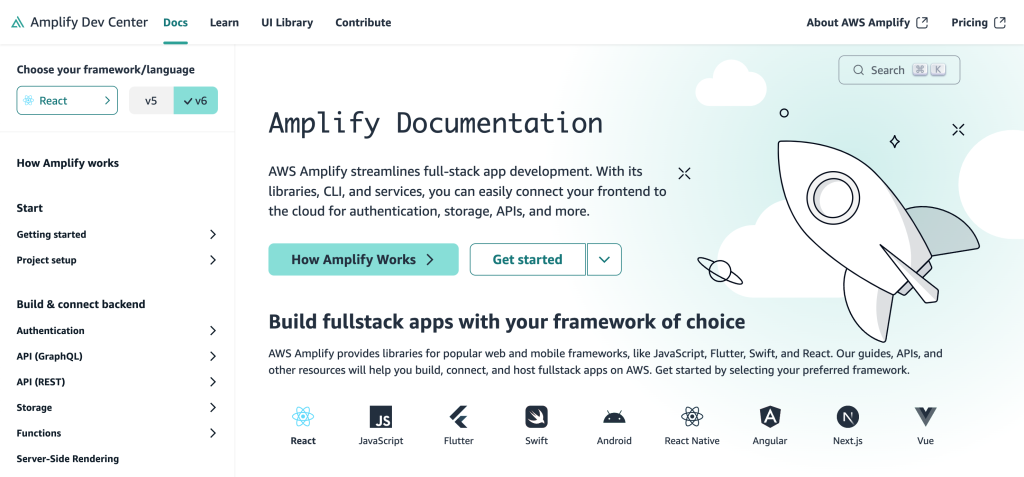


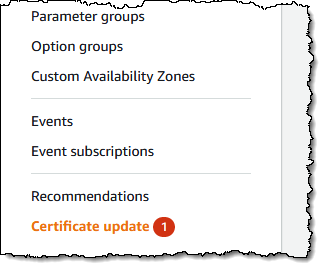 Don’t be surprised if you have seen the Certificate Update in the


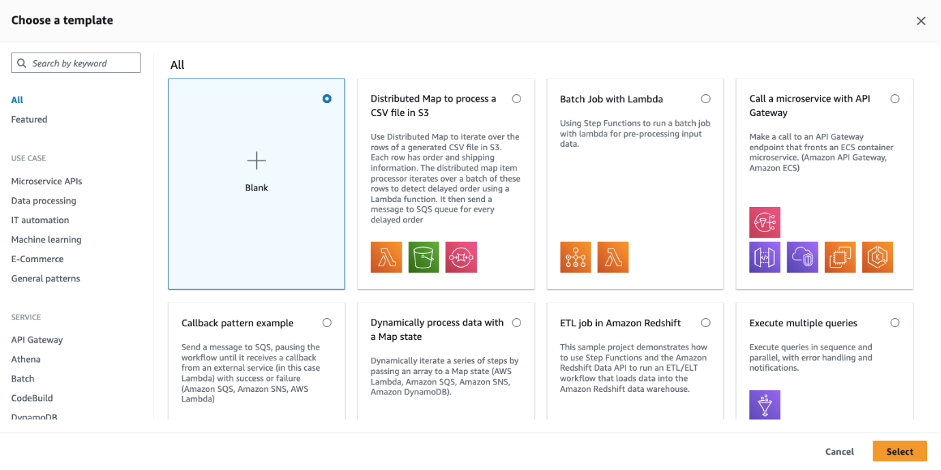


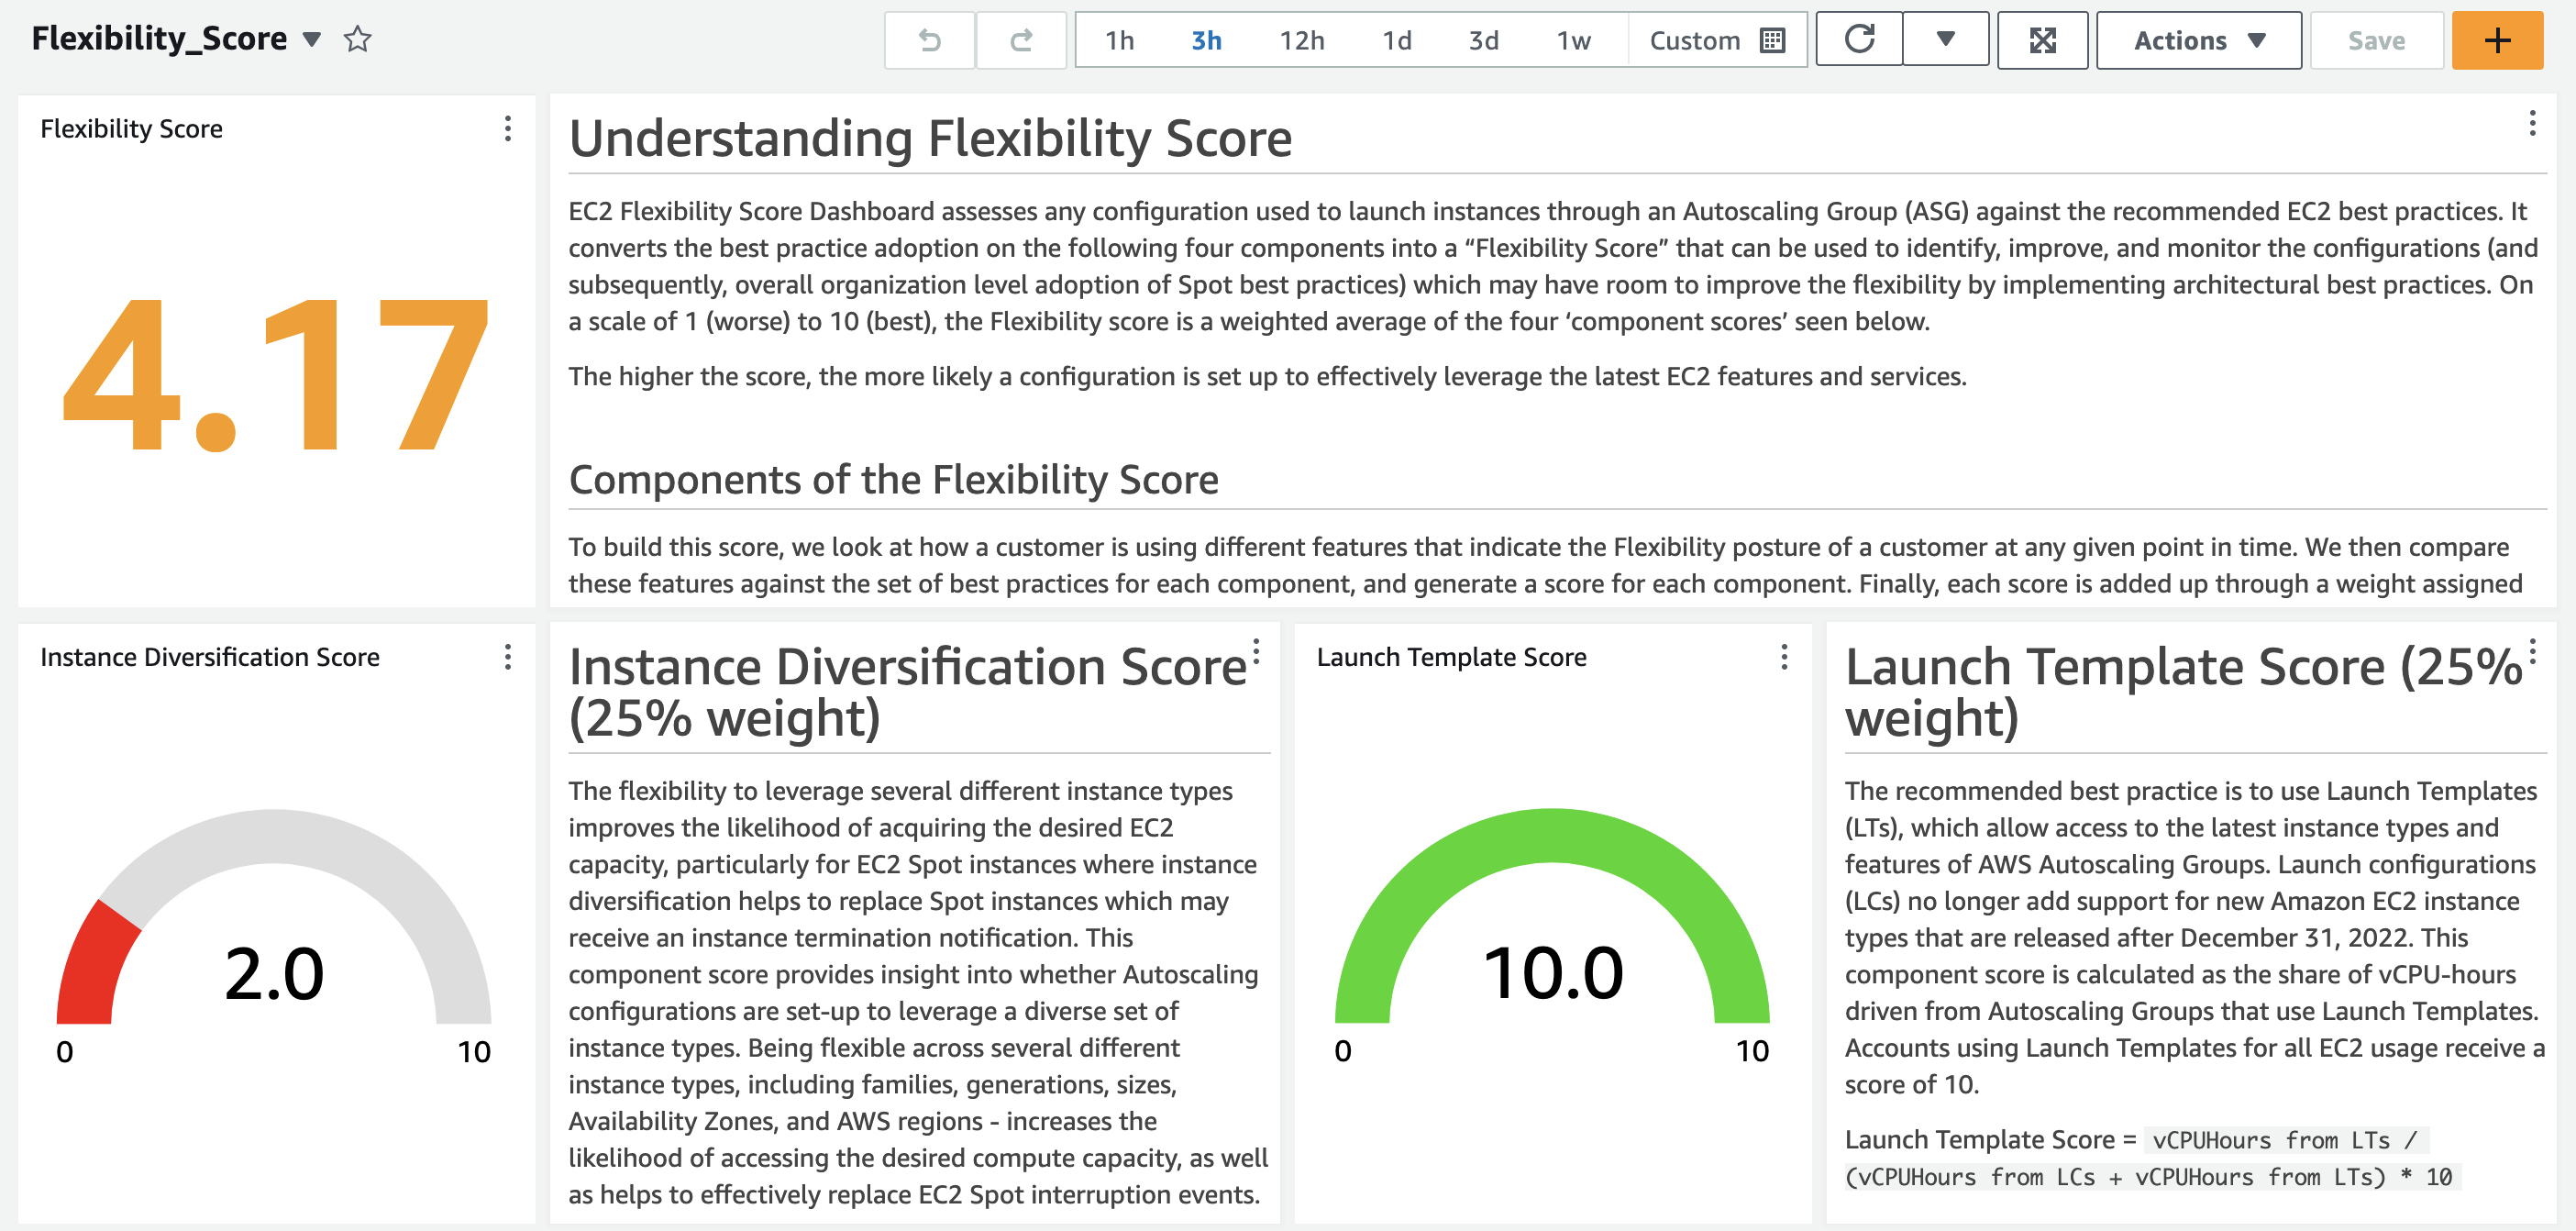


 Anand Komandooru is a Senior Cloud Architect at AWS. He joined AWS Professional Services organization in 2021 and helps customers build cloud-native applications on AWS cloud. He has over 20 years of experience building software and his favorite Amazon leadership principle is “
 Li Liu is a Senior Database Specialty Architect with the Professional Services team at Amazon Web Services. She helps customers migrate traditional on-premise databases to the AWS Cloud. She specializes in database design, architecture, and performance tuning.
 Neil Potter is a Senior Cloud Application Architect at AWS. He works with AWS customers to help them migrate their workloads to the AWS Cloud. He specializes in application modernization and cloud-native design and is based in New Jersey.
 Vivek Shrivastava is a Principal Data Architect, Data Lake in AWS Professional Services. He is a big data enthusiast and holds 14 AWS Certifications. He is passionate about helping customers build scalable and high-performance data analytics solutions in the cloud. In his spare time, he loves reading and finds areas for home automation.


 AWS Global Summits – Check your calendars and sign up for the AWS Summit close to where you live or work:


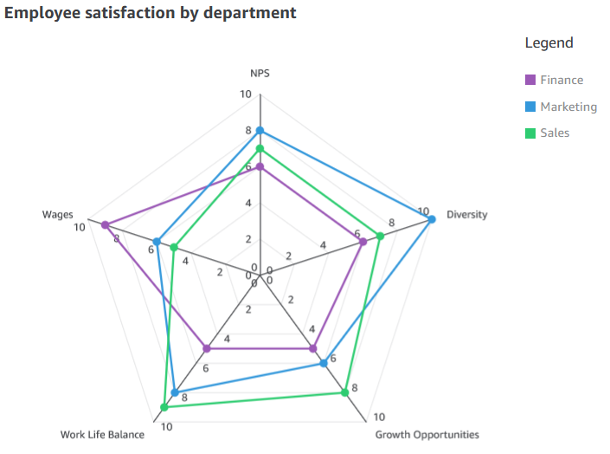


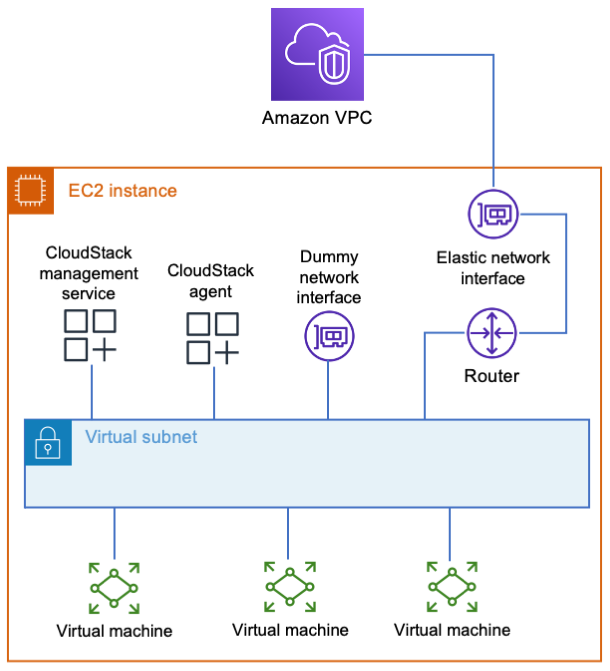


 .
.